CONTROLLING THE GROWTH OF MICROBES
LEARNING OBJECTIVES
Perform disk diffusion sensitivity testing of antiseptics and disinfectants and evaluate the results.
Explain the difference between a disinfectant and antiseptic.
MCCCD OFFICIAL COURSE COMPETENCIES
Describe and utilize the process of scientific inquiry, its realm, and limitations.
Describe structural characteristics of the major groups of microorganisms.
Describe physical, chemical, and antibiotic methods of microbial control.
PHOTO REQUIREMENTS
Take a photo with your photo ID during the lab exercise when you see this icon.

Paste the photos into the Fermentation Questions Document.
Relevant Test Chapters:
1st-4th edition of Microbes and Society 11.2
5th edition of Microbes and Society 10.2
INTRODUCTION
There are many products on the market today that claim to kill microorganisms. The Lysol disinfecting wipes label states to disinfect a surface you must:
Pre-clean surface. Use enough fresh wipes to thoroughly wet surface. Allow to remain wet for 4 minutes. Allow surface to air dry. Toss dirty wipe away.
Do consumers use enough wipes for the surface to remain wet for 4 minutes?
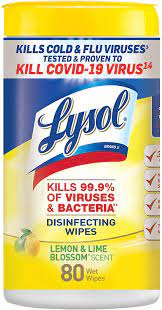
The Lysol disinfecting wipes label states-
Lysol Disinfecting Wipes eliminate the following bacteria and viruses from hard, non-porous surfaces when used as directed:
Herpes Simplex Virus Type 1, Human Coronavirus, Influenza A Virus (H1N1), Respiratory Syncytial Virus, Streptococcus pyogenes, Staphylococcus aureus, Escherichia coli O157:H7, Staphylococcus Aureus Methicillin Resistant, Salmonella enterica.
Are 4 viruses and 5 bacteria 99.9% of viruses and bacteria?
Washing our hands, taking regular showers or baths, brushing our teeth with fluoride toothpaste, and using an underarm deodorant are common practices we use to control microbial growth on our bodies. In our homes, we try to control the growth of microorganisms by cooking and refrigerating food, cleaning our kitchen and bathrooms with chemicals, and washing our clothes with detergents. Sterilization is the destruction of all forms of microbial life including endospores. Sterilization eliminates all pathogens. Surgeons use sterile instruments when performing surgery. An unopened can of food is sterile inside; during the canning process the contents of the can are sterilized. When you are practicing personal hygiene or cleaning your house you are not sterilizing, you are disinfecting. Disinfection is use of physical or chemical agent (“disinfectant”) to inhibit or destroy microbes on inanimate objects or surfaces. Disinfection does not eliminate all pathogens and does not kill all microorganisms. Antisepsis is disinfection of tissue via a chemical agent (“antiseptic”) safe to use on human tissue. Since antisepsis is a type of disinfection it does not eliminate all pathogens and does not kill all microorganisms.
Alcohol is used as an antiseptic before a blood draw or administration of an injection. Alcohol is the active ingredient in most hand sanitizers. Alcohol damages the membranes of microorganisms by dissolving their membranes and denatures proteins. Bleach (sodium hypochlorite) has been used as a disinfectant for over 200 years. Bleach is the active ingredient in nearly one third of all antimicrobial chemicals currently on the market. Bleach denatures the proteins of microorganisms. Hydrogen peroxide is used as an antiseptic. Hydrogen peroxide generates free radicals that damage microorganisms. The purpose of this lab is to test the effectiveness of the antiseptics alcohol and hydrogen peroxide and the disinfectant bleach.
SCIENTIFIC METHOD
Question-Are alcohol and hydrogen peroxide effective antiseptics? Is bleach an effective disinfectant?
Hypothesis-Hydrogen peroxide is the more effective antiseptic. Bleach is an effective disinfectant.
Experimentation-You will add alcohol, hydrogen peroxide, and bleach to sterile disks and place them on inoculated plates. A sterile disk with no antiseptic or disinfectant added will be used as a comparison, You will measure the diameter of the zone of inhibition in millimeters.
Controlling the growth of microorganisms procedure
| REQUIRED SUPPLIES FROM THE LAB KIT |
| Sterile Swabs (2)
|
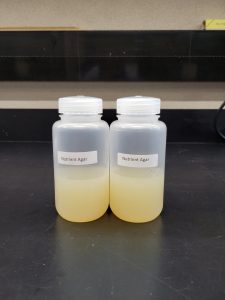
| Sterile Nutrient Agar (do not dispose of any left over agar. We will use the left over agar to pour plates for other lab exercises).
|
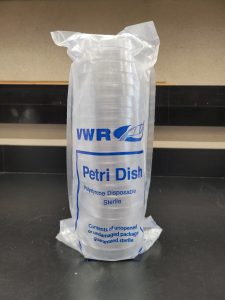
| Petri Plates (2)
|
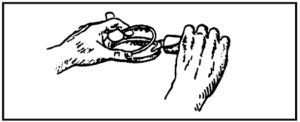
| Tweezers
|
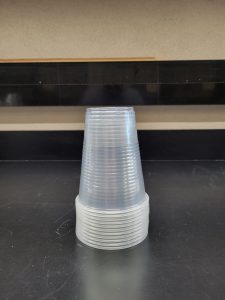
| Plastic Cups (3)
|
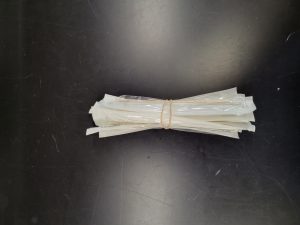
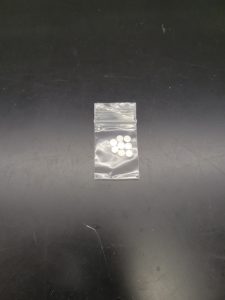
| Sterile Disks (8)
|
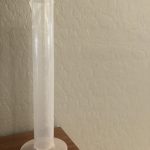
| 100 ml Graduated Cylinder
|

| REQUIRED SUPPLIES YOU PROVIDE |
| Microwave and paper plate or microwave safe plate OR stove and pot |
| Water (bottled/reverse osmosis or let tap water sit out for 24 hours) |
| Cup or bowl for surface disinfectant |
| Bleach |
| Hydrogen peroxide |
| Isopropyl alcohol |
| Disposable gloves (3 pairs) |
| Permanent marker |
| Metric ruler. Here is a link to a free printable ruler https://www.printablerulers.net/preview/Ruler_15-cm_by_mm |
MELT the nutrient agar
1. Wash your hands thoroughly with soap and water. Dry your hands with paper towel.
2. Put on a pair of gloves.
3. Prepare surface disinfectant. Using the 100 ml graduated cylinder add 180 ml of tap water to a cup or bowl. Using the 100 ml graduated cylinder now add 20 ml of bleach to the cup or bowl. The surface disinfectant (10% bleach solution) is now ready to use.
4. Disinfect your work surface with the surface disinfectant by applying surface disinfectant with a paper towel, allowing it to remain damp for 2 minutes, and then wiping away any remaining disinfectant with a dry paper towel. Throw the used paper towels in the trash.
Please watch the Melting Agar Video Guide above BEFORE you attempt to melt the nutrient agar!
5. You will now melt the agar in the bottle. The agar must be completely melted before you pour your plates. If the agar is not completely melted, the microorganisms cannot get access to the nutrients in the agar and they will not grow. Loosen or remove the cap on the nutrient agar bottle. Place the bottle in a microwave on a paper plate or microwave safe plate. Melt the agar in 10 send intervals removing the bottle from the microwave with the hot pad. Swirl (don’t shake) the contents every 10 seconds to evenly distribute the heat. Please be patient and do this in 10 second intervals! Continue this process until the agar is FULLY MELTED! There cannot be any chunks of agar or floating pieces of agar, all the agar must be liquefied. Use caution when removing the bottle from the microwave as it will be HOT! If you notice the agar boiling over, STOP the microwave and let the bottle cool down before handling with the hot pad. Hot agar can violently explode out of the bottle if heated too quickly and/or shaken. Once boiling has stopped, use a hot pad to protect your hands and remove the bottle from the microwave.
If you do not have a microwave, use your stove top. Loosen the cap on the agar bottle and place it in a pot. Add water to the pot level with the agar in the bottle. The bottle should not be floating in the water. Gently heat (simmer) the pot of water on your stove top till the agar in the bottle melts. Using a hot pad, swirl (don’t shake) the contents of the bottle about every minute. Continue this process until the agar is FULLY MELTED! There cannot be any chunks of agar or floating pieces of agar, all the agar must be liquefied.
6. After the agar is completely melted let it sit for 1-2 minutes to minimize any bubbles that may have formed.
pour 2 nutrient agar plates
Please watch the Pouring Agar Plates Video Guide Above BEFORE you attempt to pour agar plates.
1. Carefully open the Petri dish package. Pull the package down slowly to only expose the plates that you need. You need 2 plates for this lab (ignore the video saying 4 plates are needed). Fold down the rest of the plate package and remove any excess air. Tape the package closed.
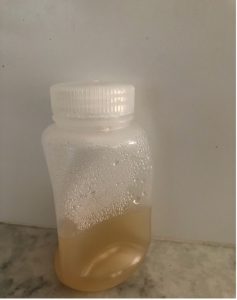
2. Use the agar sparingly. You only need enough to coat the bottom of the petri dish. If you did not watch the Pouring Agar Plates Video Guide above watch it now! Pour the fully melted agar into the bottom half of 2 Petri dishes by resting the mouth of the agar bottle against the edge of the bottom of a Petri plate, using the lid to shield the contents against contaminants in the air, and pouring the agar slowly until is almost covers the bottom of the Petri plate. Swirl the agar to see if you have enough the cover the bottom of the Petri plate, if not add a tiny bit more agar. Add the lid to the Petri plate. After your pour all the plates, if there is any agar left in the bottle, put the lid tightly on the bottle right away. Store the left-over agar at room temperature until the agar solidifies, then return the agar to the refrigerator. The bottle may collapse in on itself like the photo below. Do not worry this is normal. Allow the plates to solidify undisturbed. This should take approximately 30–60 minutes. Dispose of your gloves in the trash.
samples and Bacterial Lawns
1. Wash your hands with soap and water.
2. Put on a pair of disposable gloves.
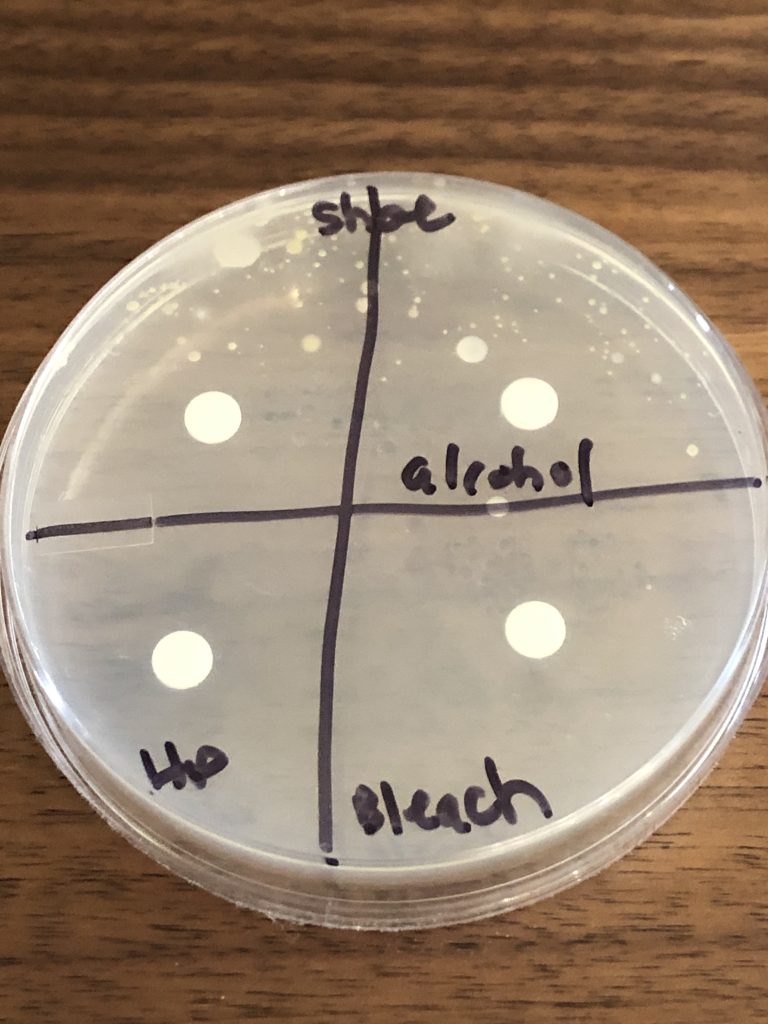
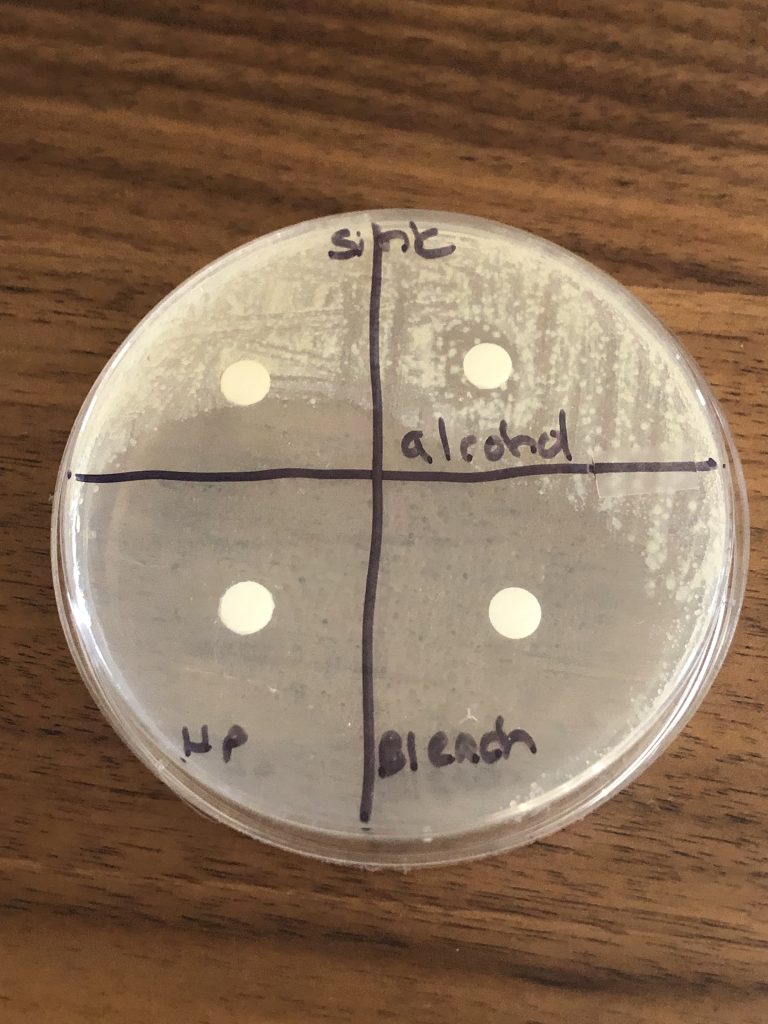
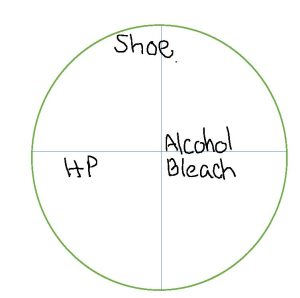
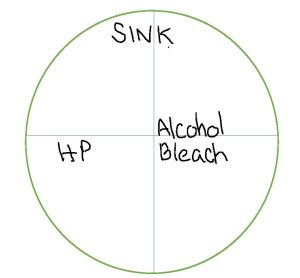
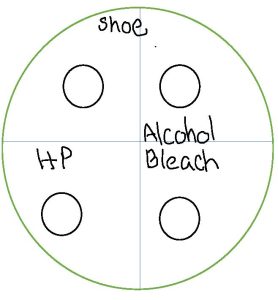
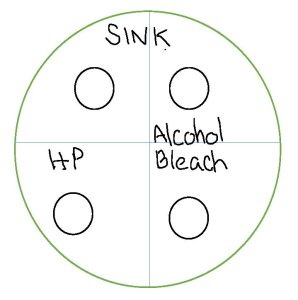
3. Use the permanent marker to label the bottom of one plate (where the solidified media is) sink and one plate shoe or an item of your choice. Use a permanent marker and divide the bottom of the two plates into four sections. Leave one of the four sections blank. Label one section alcohol. Label one section HP for hydrogen peroxide. Label one section bleach.
4. Let’s take a sample from your sink. Carefully remove one sterile swab from the package. Rub the swab all around your kitchen sink including the drain.
5. We want use the sample from the sink to make a bacterial lawn (achieve growth over the entire agar surface). Remove the lid from the agar plate labeled sink but hold it closely over the top of the plate to use as a shield to prevent airborne contamination of the plate. Swab the entire surface of the plate. Use a zig zag pattern but do not leave space between the zig zags (see the figure below).
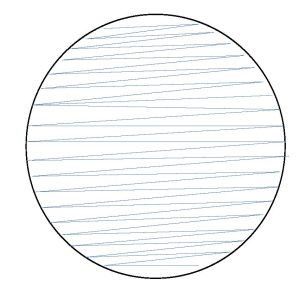
Rotate the plate 90 degrees and swab the entire plate. Rotate the plate 90 degrees and swab the entire plate. Rotate the plate 90 degrees and swab the entire plate. Ensure that you do not press too hard when streaking the swab on the agar to prevent cutting into the agar surface. Replace the lid and discard the swab is a trash receptacle.
6. Let’s take a sample from a shoe you wear all the time or an item of your choice. Carefully remove one sterile swab from the package. Moisten the swab with water. Rub the swab on the entire sole of a shoe you wear all the time or the item of your choice.
7. We want to use the sample from the shoe or item of your choice to make a bacterial lawn (achieve growth over the entire agar surface). Remove the lid from the agar plate labeled shoe but hold it closely over the top of the plate to use as a shield to prevent airborne contamination of the plate. Swab the entire surface of the plate. Rotate the plate 90 degrees and swab the entire plate. Rotate the plate 90 degrees and swab the entire plate. Rotate the plate 90 degrees and swab the entire plate. Ensure that you do not press too hard when streaking the swab on the agar to prevent cutting into the agar surface. Replace the lid and discard the swab is the trash.
add antiseptics and disinfectants
1. Use the permanent marker to label one plastic cup alcohol, one plastic cup bleach, and one plastic cup hydrogen peroxide.
2. Pour about one inch of alcohol into the cup you labeled alcohol. Pour about one inch of hydrogen peroxide into the cup you labeled hydrogen peroxide. Pour about one inch of bleach into the cup you labeled bleach.
3. Place the tweezers into the cup containing alcohol.
4. Remove the tweezers from the alcohol. All all the excess alcohol to drip off. Let the alcohol evaporate off the tweezers. Use tweezers to remove one of the sterile disks from the package. Lift the lid of the shoe plate, using the lid as a shield place this disk in the middle of the unlabeled quadrant of the shoe or item of your choice plate. Tap the disk gently. Replace the lid. Put the tweezers in the cup containing alcohol.
5. Remove the tweezers from the alcohol. All all the excess alcohol to drip off. Let the alcohol evaporate off the tweezers. Use tweezers to remove one of the sterile disks from the package. Completely submerge the disk in the alcohol. Remove the disk from the alcohol. Knock excess alcohol off the disk with the lip of the cup. Lift the lid of the shoe or item of your choice plate, using the lid as a shield place this disk in the middle of the quadrant labeled alcohol of the shoe or item of your choice plate. Tap the disk gently. Replace the lid. Put the tweezers in the cup containing alcohol.
6. Remove the tweezers from the alcohol. All all the excess alcohol to drip off. Let the alcohol evaporate off the tweezers. Use tweezers to remove one of the sterile disks from the package. Completely submerge the disk in the hydrogen peroxide. Remove the disk from the hydrogen peroxide. Knock excess hydrogen peroxide off the disk with the lip of the cup. Lift the lid of the shoe or item of your choice plate, using the lid as a shield place this disk in the middle of the quadrant labeled HP of the shoe or item of your choice plate. Tap the disk gently. Replace the lid. Put the tweezers in the cup containing alcohol.
7. Remove the tweezers from the alcohol. All all the excess alcohol to drip off. Let the alcohol evaporate off the tweezers. Use tweezers to remove one of the sterile disks from the package. Completely submerge the disk in the bleach. Remove the disk from the bleach. Knock excess bleach off the disk with the lip of the cup. Lift the lid of the shoe or item of your choice plate, using the lid as a shield place this disk in the middle of the quadrant labeled bleach of the shoe or item of your choice plate. Tap the disk gently. Replace the lid. Put the tweezers in the cup containing alcohol.
8. Repeat steps 4-7 for the sink plate.
9. Let both plates sit lid side up at room temperature for 15 minutes.
10. Pour the alcohol, bleach, and hydrogen peroxide down the sink. Run water for at least 30 seconds. Dispose of the cups in the trash.
11. Take a photo with your photo ID of the two inoculated plates. This photo will be pasted into the Controlling the Growth of Microorganisms Questions Document.
12. Incubate the plates lid side down for 3 days. We always incubate the nutrient agar plates lid side down so condensation forms on the lid not on the surface of the media where microbes are trying to grow. Incubate the plates at room temperature in a consistently warm location (not to exceed 37 °C or 100 °F) out of direct sunlight. Don’t panic if you do not see much after 24-48 hours. Dispose of your gloves in the trash.
13. Disinfect your work surface with the surface disinfectant by applying surface disinfectant with a paper towel, allowing it to remain damp for 2 minutes, and then wiping away any remaining disinfectant with a dry paper towel. Throw the used paper towels in the trash. Dispose of left over surface disinfectant by pouring it down the sink and running water for at least 30 seconds.
14. Wash your hands thoroughly with soap and water. Dry your hands with paper towel.
after 3 DAY incubation
1. After the 3 day incubation, wash your hands thoroughly with soap and water. Dry your hands with paper towel.
2. Put on a pair of gloves.
3. Prepare surface disinfectant. Using the 100 ml graduated cylinder add 180 ml of tap water to a cup or bowl. Using the 100 ml graduated cylinder now add 20 ml of bleach to the cup or bowl. The surface disinfectant (10% bleach solution) is now ready to use.
4. Disinfect your work surface with the surface disinfectant by applying surface disinfectant with a paper towel, allowing it to remain damp for 2 minutes, and then wiping away any remaining disinfectant with a dry paper towel. Throw the used paper towels in the trash.
5. Take a photo with your photo ID of the plates. Do not remove the lid to take photos. The growth must be clearly visible in the photo. You may need to experiment with lighting conditions and camera angles to get the best pictures in your work space. Paste the photo into the Controlling the Growth of Microbes Questions Document.
6. Observe the plates. A bacterial lawn will look like a cloudy film on top of the agar. If the antiseptic or disinfectant prevented the growth of bacteria, you will see a clear zone around the disk. Measure the diameter of the zone of inhibition in millimeters (millimeters are the smallest lines on the metric side of the ruler). If there is no zone of inhibition record 0 mm. If there is no growth or the zone is so large the diameter is not clear record no zone. Record your results in the data table in the Growth of Microbes Questions Document.
7. Pour bleach (not 10% bleach) onto the surface of the plates, covering the entire surface. Incubate the plates for 20 minutes, and then pour the bleach down the sink with running water.
8. Tape the plates shut and dispose of them in the trash.
9. Disinfect your work surface with the surface disinfectant by applying surface disinfectant with a paper towel, allowing it to remain damp for 2 minutes, and then wiping away any remaining disinfectant with a dry paper towel. Throw the used paper towels in the trash. Dispose of left over surface disinfectant by pouring it down the sink and running water for at least 30 seconds.
10. Dispose of your gloves in the trash.
11. Wash your hands thoroughly with soap and water. Dry your hands with paper towel.