HAND HYGIENE
LEARNING OBJECTIVES
Recognize the importance of hand hygiene in reducing the transmission of infection.
Demonstrate the correct technique for proper hand washing.
Demonstrate the correct technique when using a hand sanitizer.
Evaluate the effectiveness of hand hygiene.
MCCCD OFFICIAL COURSE COMPETENCIES
Describe and utilize the process of scientific inquiry, its realm, and limitations.
Describe structural characteristics of the major groups of microorganisms.
Describe physical, chemical, and antibiotic methods of microbial control.
PHOTO REQUIREMENTS
Take a photo with your photo ID during the lab exercises when you see this icon.

Paste the photos in the Hand Washing Questions Document.
introduction
When each microorganism divides, it gives rise to genetically identical progeny. With each generation of cell division, the number of progeny of each cell grows until discrete mounds of cells are visible to the naked eye. A colony is a visible mass of microorganisms all originating from a single cell. At least a million bacteria must be present in a colony for the unaided human eye to see the colony! Colonies have different characteristics or morphologies such as size, shape, color, etc.
The human skin is inhabited by a diverse group of microorganisms called normal flora or microbiota. The normal flora of the skin includes Staphylococcus, diphtheroids, and fungi and is usually non-pathogenic. Staphylococcus epidermidis is a significant part of the normal flora of our skin. S. epidermidis colonies are small, round, and white.
In addition to the normal flora, there are transient microorganisms that are picked up by contact with any inanimate surface (fomites), including countertops, cell phones, keyboards, and toys, as well as animals and other people. Transient microbes are present only for days or weeks. Most transient microbes are easily removed by hand washing because they are contaminants on the skin. Normal flora is more difficult to remove by hand washing because these microbes reside in hair follicles and are entrenched in the skin.
The importance of hand washing in preventing the spread of infectious disease is credited to the observations of Ignaz Semmelweis in 1846. He noted that the lack of hand hygiene was directly related to the incidence of puerperal fever (childbirth fever). Medical students would go directly from the autopsy room to the patient’s bedside and assist in child delivery without washing their hands. As head of obstetrics, Semmelweis ordered the medical students to wash their hands with a chloride of lime solution and the death rate due to puerperal fever fell from 12% to 1.2% in only one year. This success was short lived, as complaints by doctors and medical students forced Semmelweis to stop the hand washing order, causing the death rate from puerperal fever to increase once again!
The failure of medical professionals to wash their hands before examining patients has resulted in a serious increase in nosocomial (hospital-acquired) infections in patients. Scientists estimate that over 80% of infections are transmitted by hands. Guidelines from the Centers for Disease Control and Prevention (CDC) state that “hand washing is the single most important procedure for preventing nosocomial infections”, yet recent studies in hospitals show hand washing rates as low as 31%.
Washing hands with soap and water is the best way to reduce the number of microbes on them in most situations. Soap and water are more effective at removing or inactivating microbes such as Cryptosporidium, Norovirus and Clostridium difficile. If hands are visibly soiled, then hand washing is the only effective way to reduce the numbers of microbes. The surfactants in soap lift soil and microbes from the skin.
If soap and water are not available, then use a hand sanitizer that contains at least 60% alcohol. Non-alcohol based hand sanitizers are not as effective in inactivating microbes and may help increase the number of resistant organisms.
The biggest mistake that many people make is taking too little time for hand hygiene. Twenty seconds of scrubbing is the minimum amount of time necessary when using either soap and water or hand sanitizer.
The CDC outlines the following steps for proper hand washing procedure:
- Wet hands with clean, running water.
- Apply soap and lather hands by rubbing them together with the soap, ensuring full lather of the hands, between the fingers, and under the nails.
- Scrub hands for at least 20 seconds.
- Rinse hands under clean, running water.
- Dry hands using a clean towel or air-dry.
The CDC outlines the following steps for proper use of hand sanitizer:
- Apply a palm full of hand sanitizer product to the palm of one hand.
- Cover all surfaces of hands with hand sanitizer. Pay attention to the back of your hands, thumbs, and between your fingers.
This process should take about 20 seconds. Do not wipe or rinse off the hand sanitizer before it is dry.
In this lab you will test the effectiveness of different hand hygiene techniques. In Part One, we will test the effectiveness of hand washing with soap and water. In Part Two, we will test the effectiveness of hand sanitizer.
SCIENTIFIC METHOD
Question-Which hand hygiene technique is most effective?
Hypothesis-Hand washing with soap and water is more effective than hand sanitizing.
Experimentation-You will use two different hand hygiene techniques. You will observe bacterial growth before and after the two different hand hygiene techniques.
hand hygiene procedure
| REQUIRED SUPPLIES FROM THE LAB KIT |
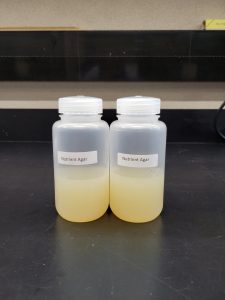
| Sterile Nutrient Agar
|
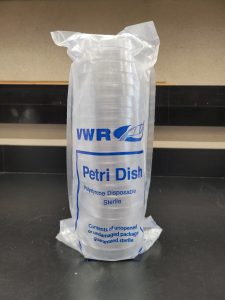
| Petri Plates (4)
|
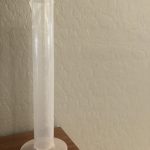
| 100 ml Graduated Cylinder
|
| REQUIRED SUPPLIES YOU PROVIDE |
| Microwave and paper plate or microwave safe plate OR stove and pot |
| Bleach (to kill microorganism cultures at the end of the experiment) |
| Disposable gloves (2 pairs) |
| Tape (any kind) |
| Hand soap |
| Hand sanitizer that contains at least 60% alcohol |
| Permanent marker |
| Cup or bowl for surface disinfectant |
| Bleach |
MELT the nutrient agar
1. Wash your hands thoroughly with soap and water. Dry your hands with paper towel.
2. Put on a pair of gloves.
3. Prepare surface disinfectant. Using the 100 ml graduated cylinder add 180 ml of tap water to a cup or bowl. Using the 100 ml graduated cylinder now add 20 ml of bleach to the cup or bowl. The surface disinfectant (10% bleach solution) is now ready to use.
4. Disinfect your work surface with the surface disinfectant by applying surface disinfectant with a paper towel, allowing it to remain damp for 2 minutes, and then wiping away any remaining disinfectant with a dry paper towel. Throw the used paper towels in the trash.
Please watch the Melting Agar Video Guide above BEFORE you attempt to melt the nutrient agar!
Melting Agar Video Guide
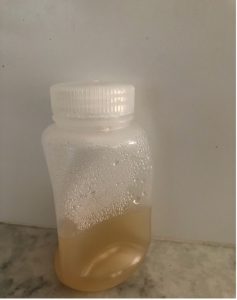
5. You will now melt the agar in the bottle. The agar must be completely melted before you pour your plates. If the agar is not completely melted, the microorganisms cannot get access to the nutrients in the agar and they will not grow. Loosen or remove the cap on the nutrient agar bottle. Place the bottle in a microwave on a paper plate or microwave safe plate. Melt the agar in 10 send intervals removing the bottle from the microwave with the hot pad. Swirl (don’t shake) the contents every 10 seconds to evenly distribute the heat. Please be patient and do this in 10 second intervals! Continue this process until the agar is FULLY MELTED! There cannot be any chunks of agar or floating pieces of agar, all the agar must be liquefied. Use caution when removing the bottle from the microwave as it will be HOT! If you notice the agar boiling over, STOP the microwave and let the bottle cool down before handling with the hot pad. Hot agar can violently explode out of the bottle if heated too quickly and/or shaken. Once boiling has stopped, use a hot pad to protect your hands and remove the bottle from the microwave.
If you do not have a microwave, use your stove top. Loosen the cap on the agar bottle and place it in a pot. Add water to the pot level with the agar in the bottle. The bottle should not be floating in the water. Gently heat (simmer) the pot of water on your stove top till the agar in the bottle melts. Using a hot pad, swirl (don’t shake) the contents of the bottle about every minute. Continue this process until the agar is FULLY MELTED! There cannot be any chunks of agar or floating pieces of agar, all the agar must be liquefied.
6. After the agar is completely melted let it sit for 1-2 minutes to minimize any bubbles that may have formed.
pour 4 nutrient agar plates (2 for Part One, 2 for part two)
Please watch the Pouring Agar Plates Video Guide Above BEFORE you attempt to pour agar plates.
Pouring Agar Plates Video Guide
1. Open the tape used to seal the Petri dish package. Pull the package down slowly to only expose the plates that you need. You need 4 plates for this lab. Fold down the rest of the plate package and remove any excess air. Tape the package closed.
2. Use the agar sparingly. You only need enough to coat the bottom of the petri dish. If you did not watch the Pouring Agar Plates Video Guide above watch it now! Pour the fully melted agar into the bottom half of 4 Petri dishes by resting the mouth of the agar bottle against the edge of the bottom of a Petri plate, using the lid to shield the contents against contaminants in the air, and pouring the agar slowly until is almost covers the bottom of the Petri plate. Swirl the agar to see if you have enough the cover the bottom of the Petri plate, if not add a tiny bit more agar. Add the lid to the Petri plate. After your pour all the plates, if there is any agar left in the bottle, put the lid tightly on the bottle right away. Store the left-over agar at room temperature until the agar solidifies, then return the agar to the refrigerator. The bottle may collapse in on itself like the photo below. Do not worry this is normal. Allow the plates to solidify undisturbed. This should take approximately 30–60 minutes.
part one
Hand Hygiene Part One Video Guide
DO NOT WASH YOUR HANDS!!
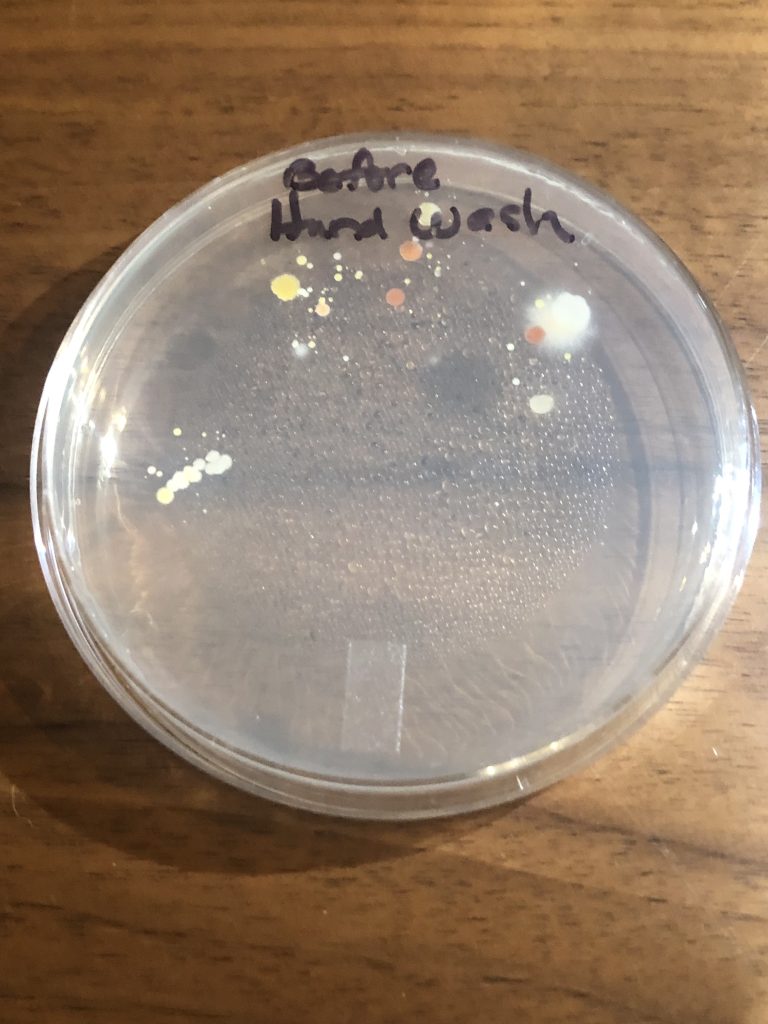
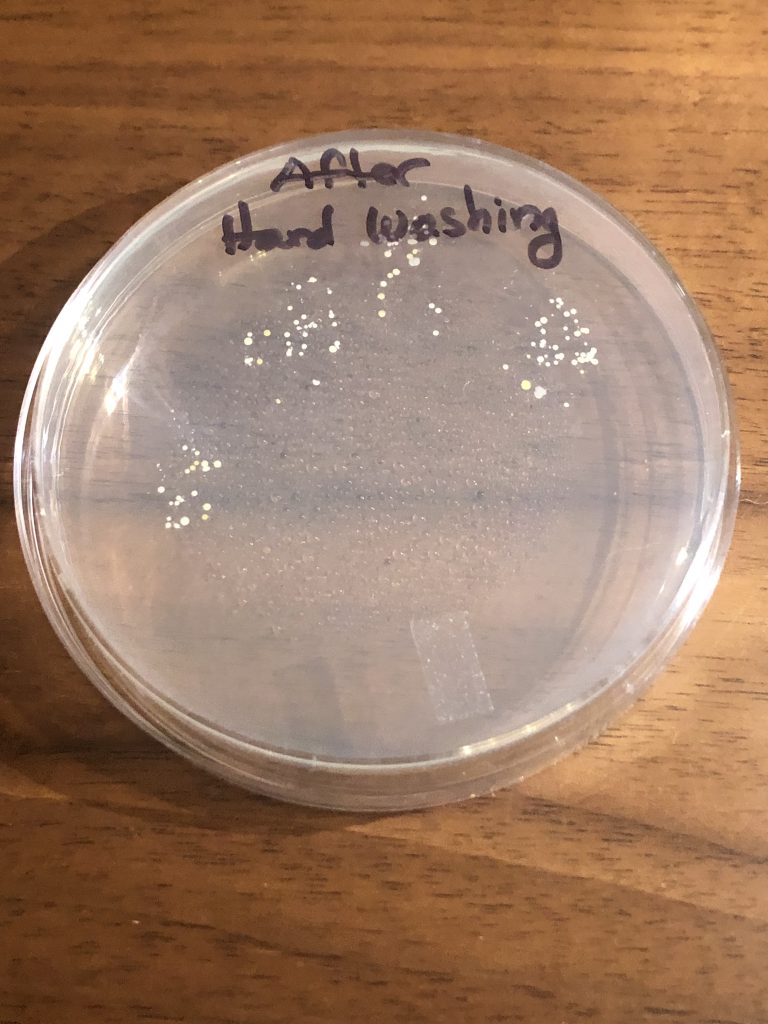
1. Use the permanent marker to label the bottom of one Petri plate “Before Hand Washing”. Label the bottom of one Petri plate “After Hand Washing”.
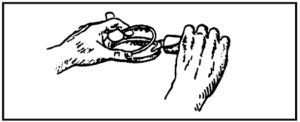
2. Remove the lid from the agar plate labeled “Before Hand Washing” but hold it closely over the top of the plate to use as a shield to prevent airborne contamination of the plate. Touch the surface of the “Before Hand Washing” plate with your fingers. Replace the lid. This plate will show you how much bacteria are on your hands before you wash them.
3. While sing “Happy Birthday” twice to ensure 20 seconds of hand washing, wet hands with clean, running water. Apply soap and lather hands by rubbing them together with the soap, ensuring full lather of the hands, between the fingers, and under the nails. Shake off the excess water. Dry your hands with a paper towel. Use the paper towel to turn off the faucet.
4. Remove the lid from the agar plate labeled “After Hand Washing” but hold it closely over the top of the plate to use as a shield to prevent airborne contamination of the plate. Touch the surface of the After Hand Washing” plate with your fingers. Replace the lid. This plate will show you how much bacteria are on your hands after you wash them.
5. Take a photo with your photo ID of the 2 inoculated plates. This photo will be pasted into the Hand Hygiene Questions Document.
6. Incubate the plates lid side down for 5 days. We will always incubate the nutrient agar plates lid side down so condensation forms on the lid not on the surface of the media and interfere with colony formation. Incubate the plates at room temperature in a consistently warm location (not to exceed 37 °C or 100 °F) out of direct sunlight. Don’t panic if you do not see much for the first 3 days.
7. Disinfect your work surface with the surface disinfectant by applying surface disinfectant with a paper towel, allowing it to remain damp for 2 minutes, and then wiping away any remaining disinfectant with a dry paper towel. Throw the used paper towels in the trash. Dispose of left over surface disinfectant by pouring it down the sink and running water for at least 30 seconds.
8. Wash your hands thoroughly with soap and water. Dry your hands with paper towel.
WE WILL BEGIN PART TWO TOMORROW
part two
Hand Hygiene Part Two Video Guide
Allow plates that have been stored in the refrigerator to sit at room temperature for 60 minutes prior to use
DO NOT WASH YOUR HANDS!!
1. Remove the two large Petri plates in the zipper baggie from the refrigerator. Allow the plates to sit at room temperature for 60 minutes.
2. Use the permanent marker to label the bottom of one large Petri plate “Before Hand Sanitizer”. Label the bottom of one large Petri plate “After Hand Sanitizer”.
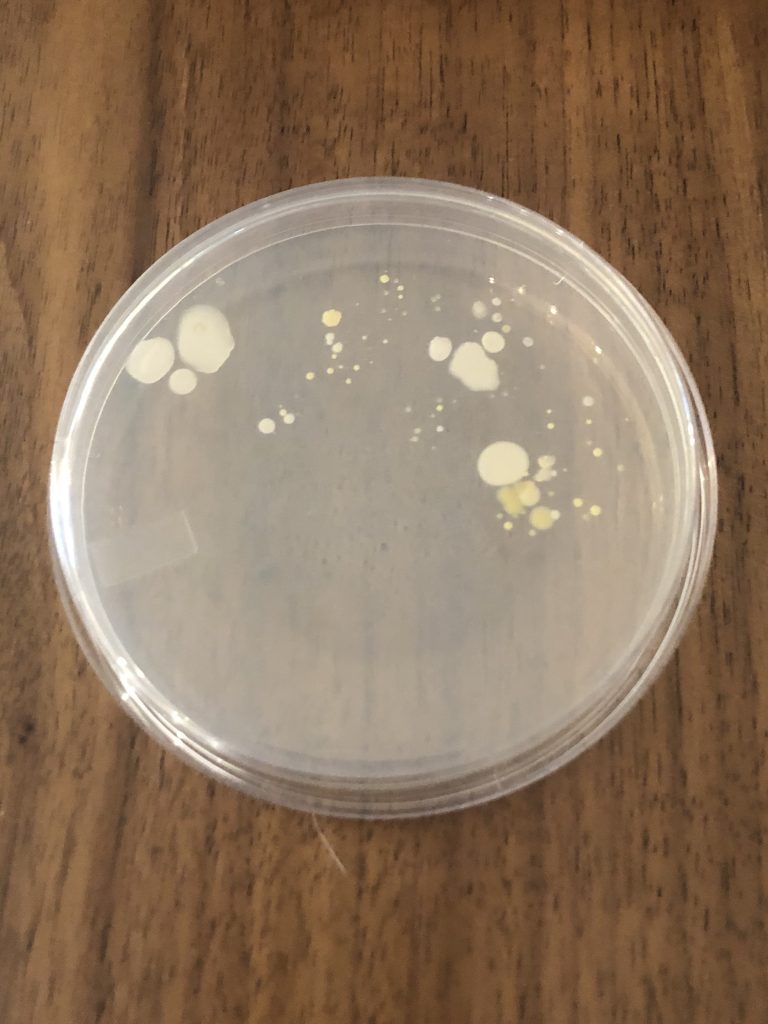
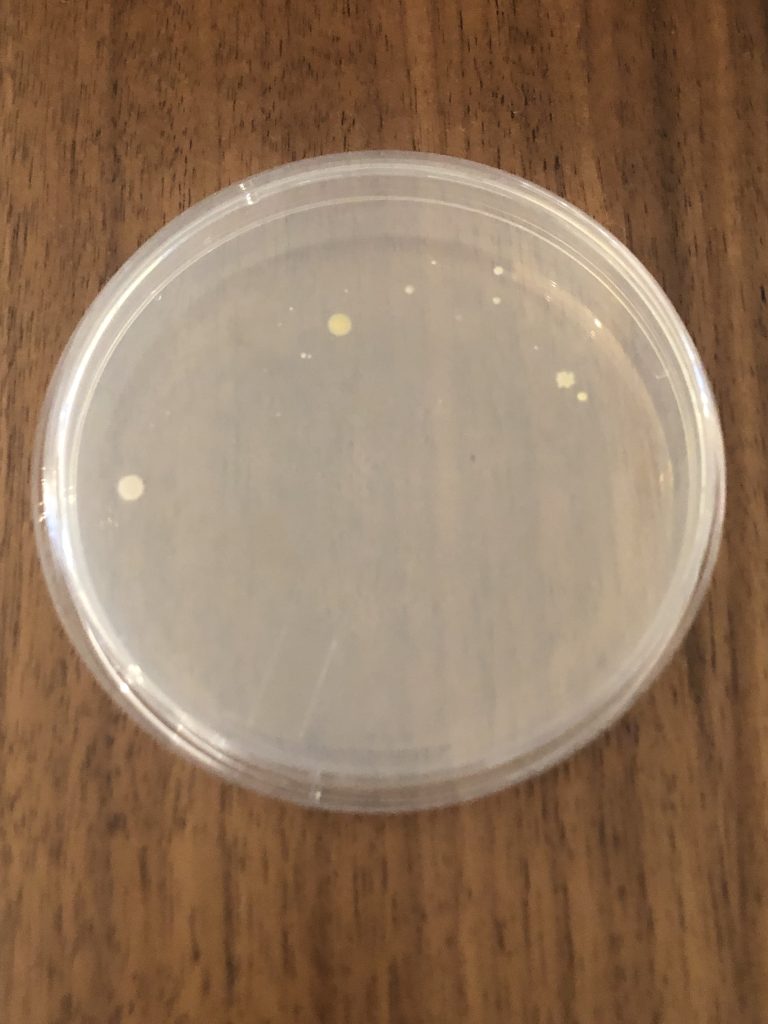
3. Remove the lid from the agar plate labeled “Before Hand Sanitizer” but hold it closely over the top of the plate to use as a shield to prevent airborne contamination of the plate. Touch the surface of the “Before Hand Sanitizer” plate with your fingers. Replace the lid. This plate will show you how much bacteria are on your hands before you sanitized them.
4. While sing “Happy Birthday” twice to ensure 20 seconds of hand sanitizing, Apply a palm full of hand sanitizer product to the palm of one hand. Cover all surfaces of hands with hand sanitizer. Pay attention to the back of your hands, thumbs, and between your fingers. Do not wipe or rinse off the hand sanitizer before it is dry.
5. Remove the lid from the agar plate labeled “After Hand Sanitizer” but hold it closely over the top of the plate to use as a shield to prevent airborne contamination of the plate. Touch the surface of the “After Hand Sanitizer” plate with your fingers. Replace the lid. This plate will show you how much bacteria are on your hands after you sanitized them.
6. Take a photo with your photo ID of the 2 inoculated plates. This photo will be pasted into the Hand Hygiene Questions Document.
7. Incubate the plates lid side down for 5 days. We will always incubate the nutrient agar plates lid side down so condensation forms on the lid not on the surface of the media where microbes are trying to grow. Incubate the plates at room temperature in a consistently warm location (not to exceed 37 °C or 100 °F) out of direct sunlight. Don’t panic if you do not see much for the first 3 days.
8. Wash your hands thoroughly with soap and water. Dry your hands with paper towel.
AFTER 5 DAY INCUBATION
1. After the 5 day incubation, wash your hands thoroughly with soap and water. Dry your hands with paper towel.
2. Prepare surface disinfectant. Using the 100 ml graduated cylinder add 180 ml of tap water to a cup or bowl. Using the 100 ml graduated cylinder now add 20 ml of bleach to the cup or bowl. The surface disinfectant (10% bleach solution) is now ready to use.
3. Disinfect your work surface with the surface disinfectant by applying surface disinfectant with a paper towel, allowing it to remain damp for 2 minutes, and then wiping away any remaining disinfectant with a dry paper towel. Throw the used paper towels in the trash.
4. Put on a pair of disposable gloves.
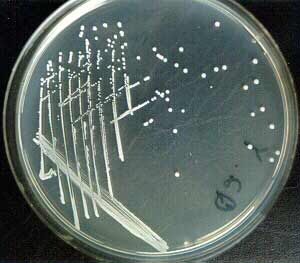
5. Take a photo with your photo ID of the plates. Do not remove the lid to take photos. The growth must be clearly visible in the photo. You may need to experiment with lighting conditions and camera angles to get the best pictures in your work space. Paste the photo into the Hand Hygiene Questions Document.
6. Observe the plates. Are Staphylococcus epidermidis colonies present? Do you see less growth on the After plates? Are there colonies of different sizes, shapes, or colors? Record your results in the data table in the Hand Hygiene Questions Document.
7. Pour bleach (not 10% bleach) onto the surface of the plates, covering the entire surface. Incubate the plates for 20 minutes, and then pour the bleach down the sink with running water.
8. Tape the plates shut and dispose of them in the trash.
9. Dispose of your gloves in the trash.
10. Disinfect your work surface with the surface disinfectant by applying surface disinfectant with a paper towel, allowing it to remain damp for 2 minutes, and then wiping away any remaining disinfectant with a dry paper towel. Throw the used paper towels in the trash. Dispose of left over surface disinfectant by pouring it down the sink and running water for at least 30 seconds.
11. Wash your hands thoroughly with soap and water. Dry your hands with paper towel.