
ASEPTIC TRANSFER
LEARNING OBJECTIVES
Define aseptic transfer and aseptic technique
Differentiate among the following types of media – broth, slant, plate
Aseptically transfer bacteria from one form of culture medium to another
Correctly use an inoculating loop
MCCCD OFFICIAL COURSE COMPETENCIES
Utilize aseptic technique for safe handling of microorganisms
Apply various laboratory techniques to identify types of microorganisms
Identify structural characteristics of the major groups of microorganisms
Compare and contrast prokaryotic cell and eukaryotic cell
Compare and contrast the physiology and biochemistry of the various groups of microorganisms
MATERIALS
Stock Cultures:
Escherichia coli slant culture 12/2 lab sections (2 students will share the culture)
Staphylococcus epidermidis broth culture 12/2 lab sections (2 students will share the culture)
Media:
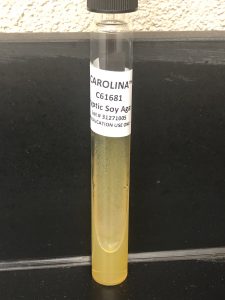
1 Sterile trypticase soy agar slant (TSA) per student
1 Sterile trypticase soy broth (TSB) per student
Equipment:
Inoculating loop
Test tube rack
bacticinerator
Permanent marking pen or wax pencil
BACTERIA ALBUM LINK
Nutrient material suitable for the cultivation of microorganisms is called media. Early microbiologists prepared their own media using available materials at the time, such as beef extract and vegetable slices. Robert Koch was a German physician who pioneered many microbiological techniques that are still used today. He prepared slices of boiled potatoes and smeared them with samples from diseased animals. The potato served as a growth medium for the bacteria infecting the animals.
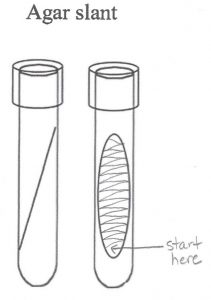
Media can be in liquid form, known as broth or a solid form called agar, referring to the solidifying ingredient. A solid medium may come in a tube (agar slant), or in Petri dish (agar plate). Melted agar is poured into a test tube and then allowed to solidify at an angle to produce an agar slant. Melted agar is poured into a Petri plate and then allowed to solidify to produce a plate. In this lab exercise, you will use a complex media called tryptic soy. Tryptic soy contains all the nutrients necessary for successful growth of a wide variety of bacteria.
Today, most media are available commercially in powdered form and only need to be rehydrated with water. The media must be sterile (free of all forms of microorganisms). Media is typically sterilized by autoclaving which uses temperature and pressure to kill all forms of microorganisms. The media provided to you in the microbiology lab has been sterilized.
Microorganisms are ubiquitous, meaning they are everywhere. In this laboratory exercise, you will introduce a sample (an inoculum) of a pure culture (single strain of bacteria) to sterile media, and transfer bacteria between media tubes. These procedures must be accomplished without introducing contamination (unwanted microorganisms) to the original culture, the sterile medium, the environment, or yourself. This process of transferring microorganisms from one place to another without contaminating the microorganisms, sterile medium, or surroundings is known as aseptic transfer. If proper aseptic transfer is not used, contaminants may be introduced into the experiment.
Aseptic transfer is part of a larger concept known as aseptic technique. Aseptic technique is a set of routine measures that are taken to prevent cultures, sterile media, solutions, etc. from being contaminated by unwanted microorganisms. Mastery of aseptic technique is important for the success of microbiology experiments. The best way to approach all microbiology experiments is to take your time and to work carefully.
During your next lab period, you will observe the media you inoculated for growth. Turbidity or cloudiness indicates growth in a broth culture. A haze or film indicates growth in a slant culture.
PRE-ASSESSMENT
PROCEDURE
Aseptic transfer – from a slant culture of E. coli to a sterile broth
FOR THIS TRANSFER: Use the E. coli stock culture
1. Use a permanent maker or wax pencil to label a test tube of sterile trypticase soy broth (TSB). Write your name or initials and the name of the bacteria you are transferring (E. coli) directly on the SIDE NOT THE LID of the test tube.
2. Sterilize your inoculating loop by inserting the loop end into the bacticinerator for a slow count of three (until the loop is red hot). The handle of the inoculating loop should not be inside the cylinder. NEVER LEAVE THE LOOP IN THE BACTICINERATOR.
3. Allow the loop to cool for approximately 5-8 seconds (sing the happy birthday song quickly twice) while holding the loop in your hand. Do not wave it in the air or let it touch anything to avoid contamination from the environment. Do not touch the loop to see if it is cool.
4. Remove the cap from the slant culture with the little finger of the hand holding the inoculating loop. Continue to hold the cap in your little finger as you work so you do not contaminate the cap.
5. Touch your cool inoculating loop to the growth on the slant culture. Obtain only a pinpoint amount of inoculum on your loop.
6. Replace the cap on the slant culture and place it back in the test tube rack.
7. Pick up your labeled test tube of trypticase soy broth. Remove the cap with your little finger. Touch the inside of the glass with your inoculating loop where it will be covered up with the broth media. Slide the inoculating loop against the glass to dislodge the bacteria.
8. Replace the cap to the test tube. Sterilize your inoculating loop.
9. Place your inoculated broth culture in the class test tube rack to be incubated.
AFTER INCUBATION
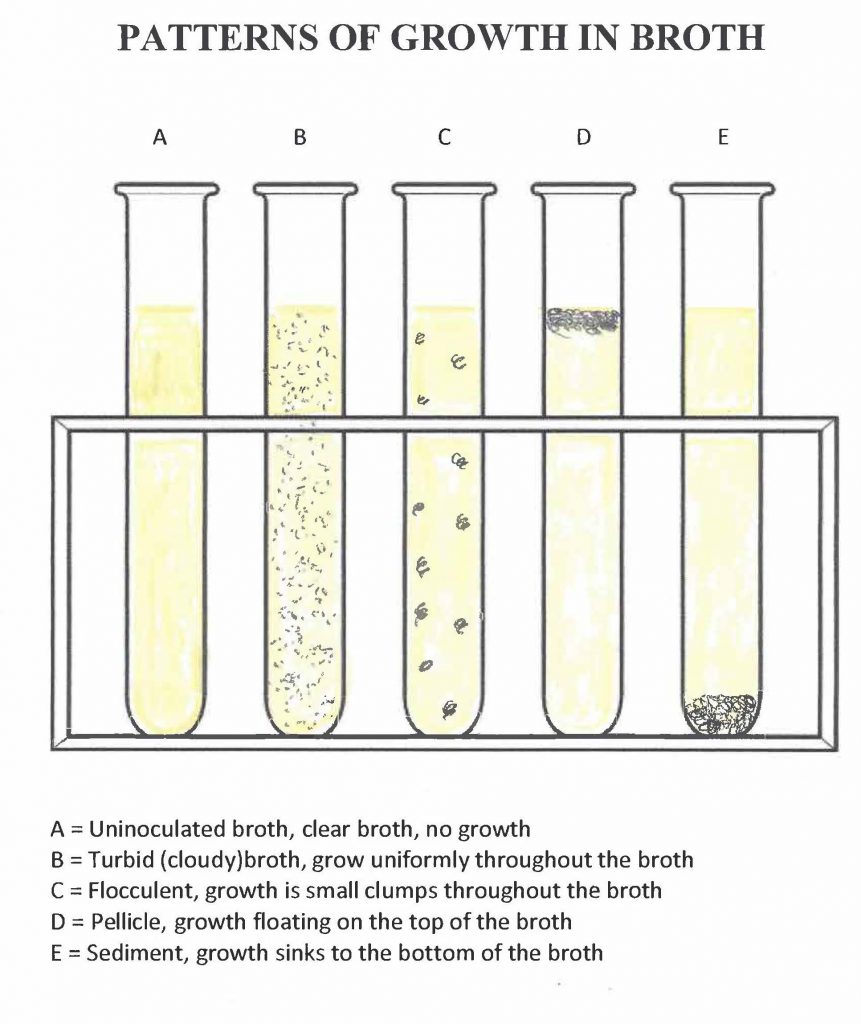
1. Observe your broth culture. Some or all of the following indicators of microbial growth should appear in your broth culture:
- Turbidity (uniform cloudiness) from the increased number of microorganisms
- Flocculent growth (growth in clumps) throughout the broth that was not present before the incubation
- Formation of sediment (solid precipitate) at the bottom of the broth that was not present prior to incubation
- Formation of a pellicle (bacterial film on the surface of the broth) that disperses into the broth when the culture is agitated
What pattern(s) of growth (turbid, flocculent, sediment, pellicle) do you see in your broth culture? See the figures below for help with the terms. Record the results of the transfer in the aseptic transfer worksheet.

 2. Place your broth culture in the discard rack to be autoclaved.
Aseptic transfer – from a broth culture of Staphylococcus to sterile agar slant
FOR THIS EXERCISE: Use the S. epidermidis stock culture
1. Use a permanent maker or wax pencil to label a test tube of sterile Trypticase soy agar slant (TSA). Write your name or initials and the name of the bacteria you are transferring (Staphylococcus) directly on the SIDE NOT THE LID of the test tube.
2. Sterilize your inoculating loop by inserting the loop end into the bacticinerator for a slow count of 3 (until the loop is red hot).
3. Allow the loop to cool for 5-8 seconds while holding the loop in your hand.
4. Suspend the bacteria in the broth culture by gently tapping the tube until the bacteria swirl up from the bottom of the tube.
NOTE: The caps are NOT leak proof! Keep the tube upright to avoid a spill.
5. Remove the cap from the broth culture with the little finger of the hand holding the inoculating loop. Continue to hold the cap in your little finger as you work so you do not contaminate the cap.
6. Immerse your inoculating loop in the broth culture so that you obtain a loopful of culture.
7. Replace the cap on the broth culture and place it back in the test tube rack.
8. Pick up your labeled slant agar tube. Remove the cap with your little finger. Continue to hold the cap in your little finger as you work so you do not contaminate the cap. Hold the inoculating loop like a pencil instead of a hammer. The motion of moving the loop comes from the action of your fingers and wrist, rather than from the elbow. While holding the tube at an angle, insert the loop and touch it to the bottom of the slant. Do not gouge the loop into the agar. Draw the loop back out of the tube, dragging it from side to side across the entire surface of the agar. This is known as “fishtail” inoculation because the way the loop is moved side to side is reminiscent of the tail movements of a swimming fish.
9. Replace the cap to the slant agar. Sterilize your inoculating loop.
10. Place your inoculated agar slant in the class test tube rack to be incubated.
AFTER INCUBATION
1. Record the results of the transfer in the aseptic transfer worksheet. Growth on the slant will appear as a haze or film on the surface of the slant.
2. Place your slant culture in the discard rack to be autoclaved.
POST TEST
DISCOVERIES IN MICROBIOLOGY
FANNY HESSE
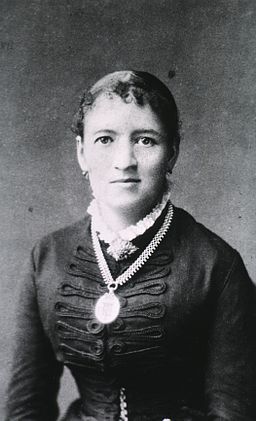 U.S. born Fanny Hesse worked as an unpaid illustrator for her husband, Walther Hesse, who was a laboratory technician for German microbiologist Robert Koch. One day in 1881, while eating lunch, Walter asked Fanny about the jellies and puddings that she made and how they managed to stay gelled even in warm weather. Fannie told him about how she learned about the seaweed product, agar-agar, from a Dutch neighbor of hers while she was growing up in New York City. Her neighbor had emigrated from Indonesia, where it was the local custom to use agar in their cooking. Fannie suggested that they try this out in their laboratory. Solid media allowed Koch to isolate the bacteria that caused tuberculosis, but Hesse never received credit for her contribution.
