16 Share Screen Annotation

Description
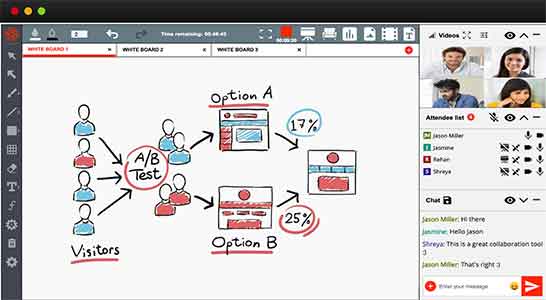
Some videoconference tools come with annotation tools for shared content. Meeting participants can simultaneously annotate when screen sharing is on, regardless of what’s being shared.
Teaching Ideas
- Use Share Screen Annotation for brainstorming. Share a whiteboard and provide students with brainstorming guidance. They can type, draw connections, or diagram ideas. If your group is larger than 10-15 people, have students use a status or reaction to indicate they have something to contribute and call on them to add to the whiteboard in turn so that it does not become chaotic and difficult to decipher.
- Demonstrate how to use software or a website interactively with Share Screen Annotation. Share your screen and activate the annotation feature. Ask for volunteers to use annotation to indicate the tool or menu item you should click on next for the task you are demonstrating.
- Use Share Screen Annotation for an identification or labeling activity. Share the image on your screen. Provide students guidance on what they should identify/label (e.g., “Label the structures inside a cell,” “Trace the current flow on a circuit diagram,” or “Identify the ‘message’ of everyone’s body language in this image”). Enable annotations and ask students to use the annotation toolbar to begin labeling the image. Review the annotations, delete duplicates, and respond to errors.
- Conduct a highlight race using Share Screen Annotation to re-engage students after 3-5 minutes of lecture. Share an image or text with students and give them instructions on what items to find. Give them 1-3 minutes to use annotation tools to locate and underline all of the items. Review the results after the time has passed, and ask students if they agree with everything that’s been marked and if anything was overlooked. Discuss/resolve any misconceptions.
- See Collaborative Whiteboard for additional ideas you can use with Screen Share Annotations.
How to Use
Both you and your students can simultaneously annotate when screen sharing is on. The annotation tools include, among others, a basic drawing tool, shapes, text, and limited symbols. Presenters can enable or disable the annotate toolbar for meeting participants. Annotations can be saved via the videoconferencing tool or by taking a screenshot. Annotation tools must be deactivated to switch back to using your mouse pointer. It’s helpful to practice using annotation tools before using them with your students so you can help them through any difficulty on their first use of the tools.
Tools
Webex Meetings
You can share your screen and annotate whatever is visible on it. You can also upload a document or add a whiteboard to the meeting to annotate with participants. The meeting host can assign annotation privileges to all participants or specific participants. Annotations can be saved as .ucf files to reuse and continue annotating in another Webex Meeting. They can also be saved in .pdf format for opening in other applications, printing, or sharing. Tools include an arrow pointer, laser pointer, lines, arrowheads, squares, ovals, check and X marks, limited color choices, and an eraser.
Zoom
You can share your screen and annotate whatever is visible on it. You can also add a whiteboard to the meeting to annotate with participants. The presenter can allow or prevent participants from annotating on the shared screen and can show or hide participants’ names when they are annotating. Annotations can be saved as .png or .pdf files for opening in other applications, printing, or sharing. Tools include lines, arrows, shapes, text, spotlight, arrow pointer, limited color choices, and an eraser.


