
6 Collaborative Whiteboard
Uses
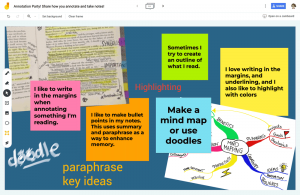
![]() Get to Know You
Get to Know You
![]() Engagement
Engagement
![]() Assessment
Assessment
Description
A Collaborative Whiteboard is a whiteboard you and your students can use synchronously together over the Internet, allowing your class to answer questions, write out problems, and draw things.
Teaching Ideas
- Write a conversation-starter question on the Collaborative Whiteboard. Have students enter their name and answer on the board. Clear the board and repeat for a few rounds.
-

Simple illustration of an ocean-continent convergent boundary. Click to play an animated simulation of a draw-with-me activity. Use the Collaborative Whiteboard for a draw-with-me presentation. Draw a simplistic version of a concept or process (biological or geological, for example). As you explain, give students an opportunity to help visualize the process by adding shapes, motions, spatial relationships, etc. on the board. Have them add important facts through annotations and captions. When the drawing is complete, have students save a screenshot that can be used for study, reference, and communication. Or save the completed drawing yourself and share it with students via Canvas.
- Place a few sentence samples on the Collaborative Whiteboard. Have students practice circling and underlining types of grammar in your pre-typed sentences. Have them discuss to compare their answers.
- Pre-type sentences with no punctuation on the Collaborative Whiteboard. Have students use a drawing or type tool to add the punctuation.
- Place an equation (or image of an equation) on the Collaborative Whiteboard. Have students practice working on the equation. Have them discuss to compare their answers. Ask a student to show their work by writing on the board. Ask if anyone solved the equation a different way, and if they did, ask that student to show their method on the board.
- Place an unlabeled image or blank diagram on the Collaborative Whiteboard. Ask students to draw or label the image (e.g., constellations, earth’s layers, or examples of optics and mechanics).
- Ask students or groups to write a key topic from the last lecture and/or a question they still have regarding the topic on the Collaborative Whiteboard. Then review each item to check for understanding. Or send students into breakout sessions to answer the questions. When they return, have them share their answers. Review any remaining unanswered items with your students.
- When reviewing whether students understand a concept, put questions with answers (A, B, C, etc.) on a Collaborative Whiteboard. Have students write or type their answers on the whiteboard. You can tell at a glance how many students are getting the concept.
- Put a topic on the Collaborative Whiteboard and have students add facts, ideas, or concepts they have learned around that topic. Use to understand what students already know at the start of a new unit, as an informal content review, or as a more formal test review.
- Ask students to write a question they still have on the material covered in class on the Collaborative Whiteboard. Ask students (or groups) to select a question they feel like they can answer. Have the person or group answer the question and share aloud with the class.
- Write a topic on the Collaborative Whiteboard. Have students write a word or fact related to the topic on the board.
- Group students and create an answer box for each group on the Collaborative Whiteboard. Play a game of jeopardy or test review. Ask students a question, give them a minute to discuss, and then have them type or write their answers in their group’s box on the board.

- Have students/student groups draw a concept, explain an idea, or solve a problem on the Collaborative Whiteboard. As a class, follow up with a discussion or constructive critique.


How to Use
Prior to the class meeting, create your Collaborative Whiteboard and set it up for student access. During the class meeting, have students contribute to the whiteboard. Highlight and call attention to specific items on the board as students add content. It’s helpful to practice using Collaborative Whiteboard tools before using them with your students so you can help them through any difficulty on their first use of the tools.
Tools
Jamboard
Jamboard is a whiteboard app available with G-Suite for Education. Its icon resembles the letter “J” created from orange and yellow simple shapes. Use its interactive canvas to doodle, drop images, add notes, and insert assets directly from the web while collaborating with students. Each whiteboard document is called a jam, and can hold multiple additional boards, called frames. Annotation features include drawing tools, simple shapes, text boxes, sticky notes, image insertion, and a laser pointer. Documents are saved to Google Drive, and share settings can be edited similarly to other G-Suite files. In your videoconferencing tool, paste the unique share link (URL) into chat so that students can open it and interact.
- Main link: https://jamboard.google.com
This video provides a quick tutorial on using Jamboard, and 5 collaborative whiteboard activity ideas:
Webex Meetings

Technical Guides
If you use Webex Meetings for your synchronous class sessions, you can use the built-in whiteboard and annotation features. While you are hosting a meeting, select Share Screen, and choose Share on the New Whiteboard tile. Enable Webex Meetings’ annotation tools for your participants, and lead students through your activity. You can also enable the annotation tools while sharing something other than a whiteboard, such as a slide deck or an open application.
This video provides a quick tutorial on how to share a whiteboard and use annotation tools in Webex Meetings:
Zoom’s Whiteboard and Annotation Tools
Technical Guides
If you use Zoom for your synchronous class sessions, you can use the built-in whiteboard and annotation features. While you are hosting a meeting, select Share Screen, and choose Share Whiteboard. Enable Zoom’s annotation tools for your participants, and lead students through your activity. You can also enable the annotation tools while sharing something other than a whiteboard, such as a slide deck or an open application.
This video provides a quick tutorial on how to share a whiteboard and use annotation tools in Zoom:
