
ASEPTIC TECHNIQUE
LEARNING OBJECTIVES
Define aseptic transfer and aseptic technique.
Differentiate among the following types of media – broth, slant, plate.
Aseptically transfer bacteria from one form of culture medium to another.
Correctly use an inoculating loop and sterile swab.
MCCCD OFFICIAL COURSE COMPETENCIES
Utilize aseptic technique for safe handling of microorganisms.
Apply various laboratory techniques to identify types of microorganisms.
Identify structural characteristics of the major groups of microorganisms.
Compare and contrast prokaryotic cell and eukaryotic cell.
Compare and contrast the physiology and biochemistry of the various groups of microorganisms.
INCUBATION TIMES
Part One Activating Serratia marcesens 3 days
Part Two Aseptic transfer from broth culture to broth, broth culture to slant, and broth to plate 3 days
NOTES
Allow media that have been stored in the refrigerator to sit at room temperature for 60 minutes prior to use.
PHOTO REQUIREMENTS
Take a photo with your photo ID during the lab exercises when you see this icon.

Paste these photos into the Aseptic Technique Questions Document.
introduction
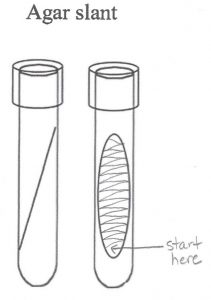
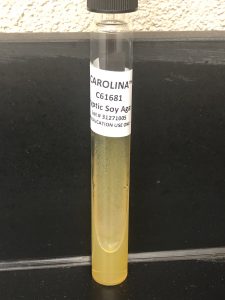
Nutrient material suitable for the cultivation of microorganisms is called media. Early microbiologists prepared their own media using available materials at the time, such as beef extract and vegetable slices. Robert Koch was a German physician who pioneered many microbiological techniques that are still used today. He prepared slices of boiled potatoes and smeared them with samples from diseased animals. The potato served as a growth medium for the bacteria. Media can be in liquid form, known as broth or a solid form called agar, referring to the solidifying ingredient. A solid medium may come in a tube (agar slant), or in Petri dish (agar plate). Melted agar is poured into a test tube and then allowed to solidify at an angle to produce an agar slant. Melted agar is poured into a Petri plate to produce a plate. In this lab exercise, you will be using a complex media called tryptic soy. Tryptic soy contains all the nutrients necessary for successful growth of bacteria. This means it contains a readily utilizable carbon and energy source.
Today, most media are available commercially in powdered form and only need to be rehydrated with water. The media must be sterile (free of all forms of microorganisms). Media is typically sterilized by autoclaving which uses temperature and pressure to kill microorganisms. The media provided in the lab kit has been sterilized. You will use disposable, plastic, inoculating tools (loops and transfer pipettes) sterilized by the manufacturer, typically using radiation. Items that do not come into direct contact with microorganisms do not need to be sterilized, but they need to be disinfected. Disinfection is use of physical or chemical agent (disinfectant) to inhibit or destroy microorganisms on inanimate objects or surfaces. For example, before and after a laboratory experiment, you will disinfect your work surface with a 10% bleach solution.
In this laboratory exercise, you will introduce a sample of bacteria (an inoculum) to sterile media, and transfer bacteria between media plates and tubes. These procedures must be accomplished without introducing contamination (unwanted microorganisms) to the original medium, the new medium, the environment, or yourself. This process of transferring microorganisms from one place to another without contaminating the microorganisms, sterile medium, or surroundings is known as aseptic transfer. If proper aseptic transfer is not used, contaminants may be introduced into the experiment.
Aseptic transfer is part of a larger concept known as aseptic technique. Aseptic technique is a set of routine measures that are taken to prevent cultures, sterile media, solutions, etc. from being contaminated by unwanted microorganisms. Mastery of aseptic technique is important for the success of microbiology experiments. The best way to approach all microbiology experiments is to take your time and to work carefully.
If at any point you suspect that you may have disrupted aseptic conditions, take corrective measures. For instance, if your disinfected work area is touched by a sterile inoculating loop, the loop is no longer considered sterile and should be disinfected and disposed of. If you must handle something that has not been disinfected, remove your gloves, perform the task, and then put of fresh gloves.
Aseptic technique is critical in maintaining a pure culture, a pure culture contains a single species of microorganism. In this course, you will keep pure cultures of bacteria free of contamination will propagating it through a process known as subculturing. A subculture is produced when a small amount of bacteria (an inoculum) is taken from a pure culture and inoculated (introduced) into fresh, sterile medium.
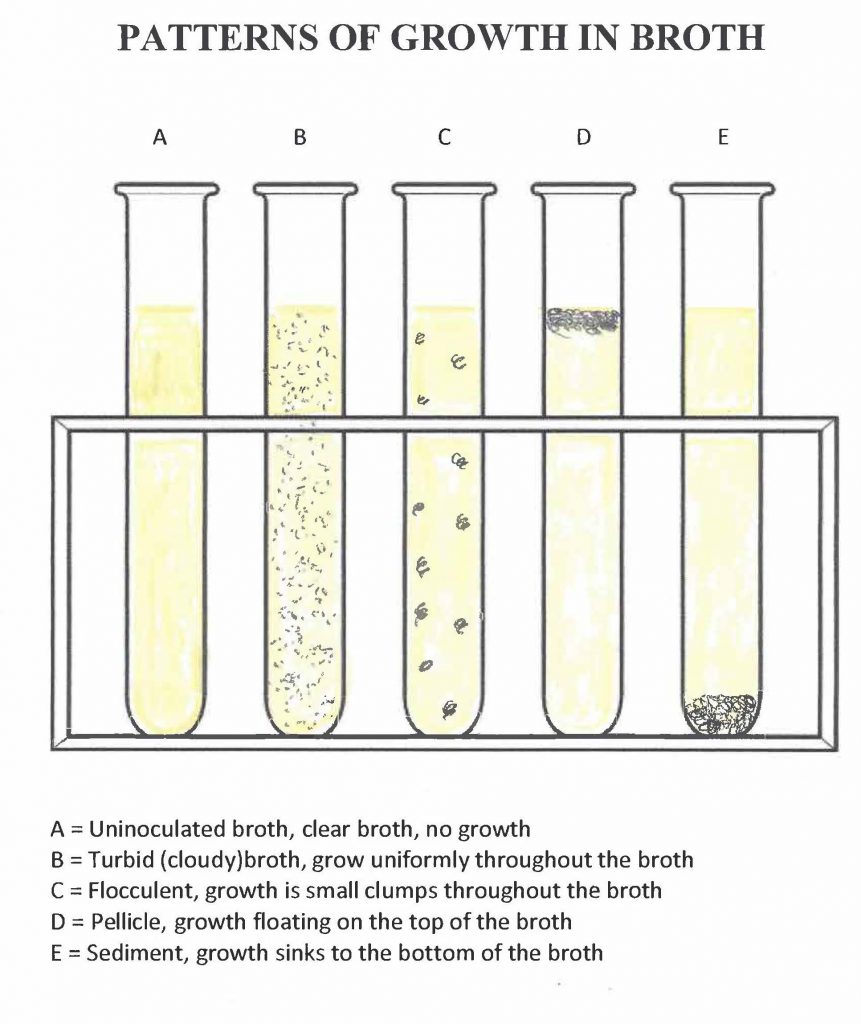
Some or all of the following indicators of microbial growth should appear after a broth medium has been inoculated and incubated:
- Turbidity (uniform cloudiness) from the increased number of microorganisms
- Flocculent growth (growth in clumps) throughout the broth that was not present before the incubation
- Formation of sediment (solid precipitate) at the bottom of the broth that was not present prior to incubation
- Formation of a pellicle (bacterial film on the surface of the broth) that disperses into the broth when the culture is agitated
S. marcescens is a Gram-negative bacterium and opportunistic pathogen. S. marcescens is a ubiquitous (found everywhere) bacterium which has been isolated from soil, water, and insects. S. marcescens expresses prodigiosin (a red pigment with no known function) when it is grown at temperatures below approximately 37 °C (98.6 oF). S. marcescens accounts for 1-2% of hospital acquired infections which are mostly confined to the respiratory tract, the urinary tract, surgical wounds and soft tissues.
In this lab exercise. you will demonstrate proper use of aseptic technique by activating a lyophilized culture and then aseptically transferring from broth to broth, broth to slant, and broth to plate.
SAFETY
This investigation requires safety goggles, gloves, a lab apron, and proper attire. Read all the instructions for this laboratory exercise before beginning. Follow the instructions closely and observe established laboratory safety practices as outlined in the Safety laboratory exercise. Email your instructor with any questions.
 Isopropyl alcohol is flammable. Keep containers of isopropyl alcohol away from any heat or flame sources.
 Chlorine bleach is a corrosive material. Use these materials near a source of running water that can be used as a safety eye wash or safety shower if any corrosive material comes in contact with skin or eyes. Do not use bleach in an area without proper ventilation.
part one–activating Serratia marcescens
| PROPER ATTIRE AND REQUIRED PERSONAL PROTECTIVE EQUIPMENT (PPE) |
| Laboratory safety apron (from the lab kit, may be a different color). Wear a long-sleeve shirt under the laboratory safety apron.
|
| Safety goggles (from the lab kit)
|
| Disposable gloves (from the lab kit)
|
| Closed-toe shoes that are solid, not made of cloth, not perforated (no ballet flats). To reduce exposure of your body, wear long pants, no skin can be showing, so you may have to wear socks with your shoes. A skirt can be worn but it must fit close to the body and again no skin can be showing. Long hair should be fastened and dangling jewelry or loose hanging garments or sleeves should not be worn. They may contaminate microbial cultures. Avoid loose or dangling clothing or jewelry that could catch on objects or interfere with the lab exercise. |
| REQUIRED SUPPLIES FROM THE LAB KIT |
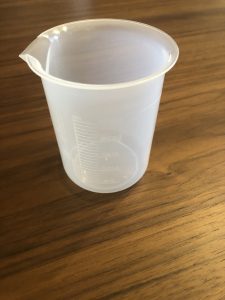
| 250 ml beaker
|
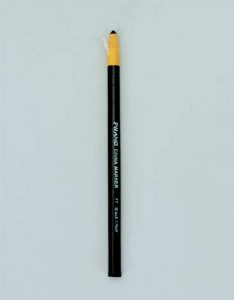
| Grease pencil
|
|
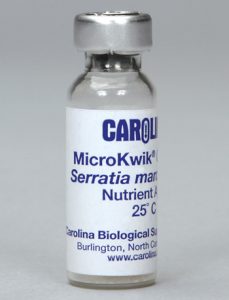
| Lyophilized Serratia marcescens culture (stored in the refrigerator)
|
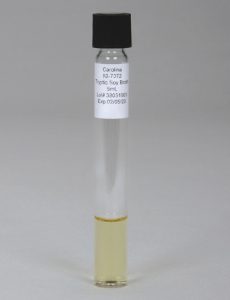
| Tryptic soy broth (1) (stored in the refrigerator) Do not remove the cap!
Allow media that have been stored in the refrigerator to sit at room temperature in the tube rack for 60 minutes prior to use
|
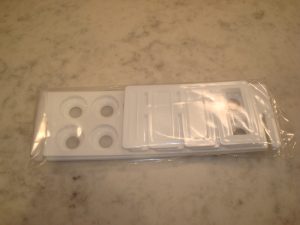
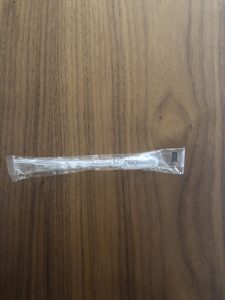
| Sterile Transfer Pipette (2) Do not open the package!
|
| REQUIRED SUPPLIES YOU PROVIDE |
| Bleach |
| Isopropyl alcohol |
| Paper towels |
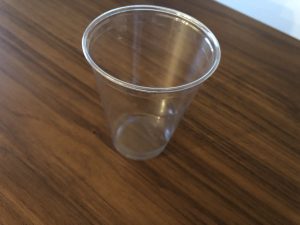
| Small disposable plastic container (plastic cup or empty water bottle) filled half way with isopropyl alcohol for disinfect inoculating tools (for lab use only)
|
| Large disposable plastic container filled half way with 10% bleach solution for disinfecting cultures (for lab use only)
|
| Resealable plastic bag (sandwich or quart size) |
| Timer or stopwatch, or resealable plastic bag to protect your cell phone if using it as a timer |
| Cell phone or digital camera to take digital photos |
| Fine tip permanent marker to be used instead of grease pencil (optional) |

PART ONE-activating serrATIA MARCESCENS procedure
PLEASE NOTE THE CONTENTS OF THE LAB KIT HAVE CHANGED. IN THE DEMONSTRATION VIDEO BELOW NUTRIENT BROTH IS USED. YOU WILL USE TRYPTIC SOY BROTH INSTEAD OF NUTRIENT BROTH.
Read all instructions carefully before you start the experiment. Wear proper attire when performing laboratory experiments. Allow media that have been stored in the refrigerator to sit at room temperature for 60 minutes prior to use. Read each step carefully and watch any accompanying video. Think about what you are going to do before you do it. Once you begin, move with purpose and focus.
1. Wash your hands thoroughly with soap and water. Dry your hands with paper towel. Put on your PPE (gloves, safety goggles, apron).
2. Prepare your surface disinfectant. Add 180 ml of tap water to the 250 ml beaker. Now add 20 ml of bleach to the 250 ml beaker. Your surface disinfectant (10% bleach solution) is now ready to use.
3. Disinfect the work surface, tube rack, and grease pencil or permanent marker with surface disinfectant by applying 10% bleach solution with a paper towel, allowing it to remain damp for 2 minutes, and then wiping away any remaining disinfectant with a dry paper towel. Throw the used paper towels in the trash.
4. Prepare for inoculating tool disinfection by filling a small, disposable, plastic container (8 ounce or larger plastic cup or empty water bottle) half full with isopropyl alcohol. Prepare for culture disinfection by filling a large, disposable, plastic container half way with surface disinfectant (10% bleach solution).
5. In this lab exercise, we will be using a S. marcescens culture that has been lyophilized (freeze-dried) to prolong its shelf life. You will rehydrate the lyophilized culture with medium with nutrient broth, and then incubate the rehydrated culture to allow the bacteria to increase in number via binary fission. Retrieve one tryptic soy broth tube from the refrigerator. Place the tube in the disinfected tube rack on the disinfected work surface. Allow the tube to sit 60 minutes at room temperature prior to use.
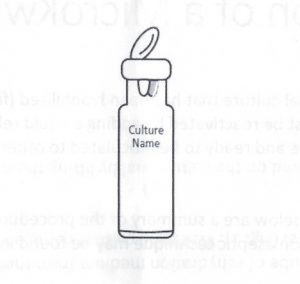
6. Using the grease pencil or permanent marker, label the tryptic soy broth with the name of the organism (S. marcescens) and the date.
7. Carefully remove the metal band from the S. marcescens culture vial by lifting the metal circle in the center and then pulling to one side. There is an arrow on the top of the metal band, lift there. The metal band may be discarded in the trash.
8. Remove the sterile transfer pipette from its wrapping by grasping the pipette at the bulb end. DO NOT set the pipette down; instead, hold it in your dominant hand.
9. Using the pinky finger of your dominant hand (or your pinky and ring fingers), remove the cap from the tryptic soy broth. DO NOT set the cap down. Hold it with your pinky while the tube is open.
10. Holding the tube at an angle, insert the pipette tip to obtain 1 ml of tryptic soy broth (there are markings on the stem of the pipette to measure 1 ml). Replace the cap. Set the nutrient broth tube in the tube rack.
11. Using your non-dominant hand, remove the rubber stopper from the lyophilized S. marcescens culture vial.
12. Dispense 1 ml of tryptic soy broth into the lyophilized S. marcescens. Use the transfer pipette to stir the contents of the vial, breaking up the lyophilized pellet if needed. Replace the rubber stopper and wait for 1 minute. Place the used transfer pipette in the inoculating tools disposal cup/bottle and let it soak for at least 30 minutes before discarding it in the trash. Used alcohol can be poured down the drain. Allow the water to run for at least 30 seconds to dilute the alcohol.
13. Remove the cap from the tryptic soy broth, do not set the cap down.
14. Use a new sterile transfer pipette to transfer the rehydrated S. marcescens from the vial to the tube of tryptic soy broth and replace the cap. Set the tube in the tube rack. Screw the cap to the point of finger tightness, then backwards about one quarter of a turn. This will leave the cap just loose enough that air (but not contaminants) can enter the tube.
15. Set the newly inoculated tryptic soy broth tube in the tube rack for incubation, this will become your S. marcescens tryptic soy broth culture after it has incubated.
16. Place the used transfer pipette in the inoculating tools disposal cup/bottle and let it soak for at least 30 minutes before discarding it in the trash. Used alcohol can be poured down the drain. Allow the water to run for at least 30 seconds to dilute the alcohol.
17. Place the S. marcescens vial and rubber cap into the culture disposal container. Allow them to soak at least 24 hours before placing them in a sealed plastic bag and disposing of them in the trash. Pour the 10% bleach down a drain and flush with excess water for at least 30 seconds to dilute the bleach.
18. Take a photo with your photo ID of the rehydrated S. marcescens culture in tryptic soy broth. This photo will be pasted into the Aseptic Technique Questions Document.
19. Incubate the S. marcescens tryptic soy broth culture for 3 days in a consistently warm location (not to exceed 37 °C or 100 °F) out of direct sunlight.
20. Disinfect your work area with 10% bleach solution. Wash your lab bench with soap and water to remove the bleach residue. Wash your hands thoroughly with soap and water. Dry your hands with paper towel.
AFTER 3 DAY INCUBATION
Read all instructions carefully before you start the experiment. Wear proper attire when performing laboratory experiments.
1. After the 3 day incubation, wash your hands thoroughly with soap and water. Dry your hands with paper towels. Put on your PPE (gloves, safety goggles, apron).
2. Prepare your surface disinfectant. Add 180 ml of tap water to the 250 ml beaker. Now add 20 ml of bleach to the 250 ml beaker. Your surface disinfectant (10% bleach solution) is now ready to use.
3. Disinfect the work surface, tube rack, and grease pencil or permanent marker with surface disinfectant by applying 10% bleach solution with a paper towel, allowing it to remain damp for 2 minutes, and then wiping away any remaining disinfectant with a dry paper towel. Throw the used paper towels in the trash.
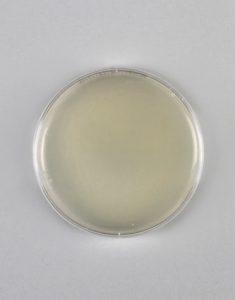
4. If the bacteria grew in the broth, the broth will appear turbid (cloudy) when compared to a sterile tryptic soy broth.
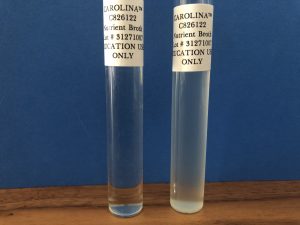
5. Take a photo with your photo ID of your S. marcescens tryptic soy broth culture. The growth must be clearly visible in the photo. Do not remove the cap to take photos. You may need to experiment with lighting conditions and camera angles to get the best pictures in your work space. This photo will be pasted into the Aseptic Technique Questions Document.
6. Record the pattern of growth in the S. marcescens tryptic soy broth culture in Table 1 of the Aseptic Technique Questions Document.
7. DO NOT dispose of your S. marcescens tryptic soy broth culture! You will use your S. marcesens broth culture in PART TWO of this lab exercise. Begin PART TWO ASEPTIC TRANSFER Now!
part two-Aseptic Transfer
| REQUIRED SUPPLIES FROM THE LAB KIT |
| Grease pencil
|
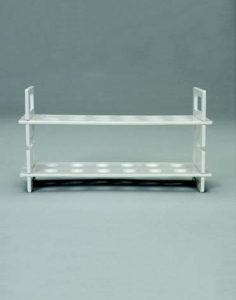
| Tube rack
|
| Tryptic soy slant (1) (stored in the refrigerator) Do not open the cap!
DO NOT USE A TRIPLE SUGAR IRON AGAR SLANT. PLEASE MAKE SURE YOU ARE USING TRYPTIC SOY AGAR SLANT!! Allow media that have been stored in the refrigerator to sit at room temperature in the tube rack for 60 minutes prior to use
|
| Tryptic soy broth (1) (stored in the refrigerator) Do not open the cap!
Allow media that have been stored in the refrigerator to sit at room temperature in the tube rack for 60 minutes prior to use
|
| Tryptic soy agar plate (1) (stored in the refrigerator) Do not open the lid!
PLEASE USE A TRYPTIC AGAR PLATE. DO NOT USE ONE OF THE OTHER AGAR PLATES! Allow media that have been stored in the refrigerator to sit at room temperature for 60 minutes prior to use
|
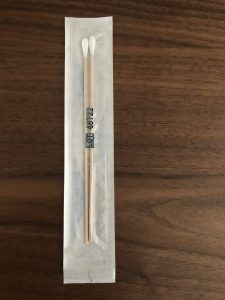
| Sterile swabs (2) Do not remove the swab from the package!
|
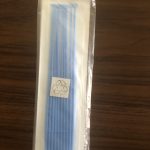
| Sterile inoculating loop (1) Do not remove the loop from the package!
|
| REQUIRED SUPPLIES YOU PROVIDE |
| Your Serratia marcescens broth culture from Part One of this lab exercise Activating Serratia marcescens after 3 day incubation |
| Bleach |
| Isopropyl alcohol |
| Paper towels |
| Small disposable plastic container (plastic cup or empty water bottle) filled half way with isopropyl alcohol for disinfect inoculating tools (for lab use only)
|
| Large disposable plastic container filled half way with 10% bleach solution for disinfecting cultures (for lab use only)
|
| Timer or stopwatch, or resealable plastic bag to protect your cell phone if using it as a timer |
| Cell phone or digital camera to take digital photos |
| Fine tip permanent marker to be used instead of grease pencil (optional) |
ASEPTIC TRANSFER FROM BROTH CULTURE TO STERILE BROTH PROCEDURE
Read all instructions carefully before you start the experiment. Wear proper attire when performing laboratory experiments. Allow media that have been stored in the refrigerator to sit at room temperature for 60 minutes prior to use. Read each step carefully and watch any accompanying video. Think about what you are going to do before you do it. Once you begin, move with purpose and focus.
1. Prepare for inoculating tool disinfection by filling a small, disposable, plastic container (8 ounce or larger plastic cup or empty water bottle) half full with isopropyl alcohol.
2. Retrieve one tryptic soy broth tube, one tryptic soy slant, and one tryptic soy agar plate from the refrigerator. Place the tubes in the disinfected tube rack on the disinfected work surface. Allow the tubes and plate to sit 60 minutes at room temperature prior to use.
3. Using the grease pencil or permanent marker, label the tryptic soy broth with the name of the organism (S. marcescens) and the date. Label the tryptic soy slant with the name of the organism (S. marcescens), stock, and the date.
4. Using the grease pencil or permanent marker, label the outside of the bottom half (the half that contains the media) of the tryptic soy agar plate with the name of the organism (S. marcescens), stock, and the date.
5. Completely close the cap of your Serratia marcescens tryptic soy broth culture and resuspend by tapping or rolling gently between your palms.
PLEASE NOTE THE CONTENTS OF THE LAB KIT HAVE CHANGED. IN THE DEMONSTRATION VIDEO BELOW NUTRIENT BROTH IS USED. YOU WILL USE TRYPTIC SOY BROTH INSTEAD OF NUTRIENT BROTH.
6. Remove one sterile inoculating loop from its packaging by the handle. Handle ONLY the handle of the loop (do not handle the circular end) to maintain the sterility of the loop. Do not set the loop down. Hold it in your dominant hand.
7. Remove the cap from your S. marcescens tryptic soy broth culture. Remember do not set the cap down. Hold it in the pinky of your dominant hand while holding the tube in your non-dominant hand.
8. Holding the tube at an angle, insert the sterile loop to obtain an inoculum (a sample) of your S. marcescens tryptic soy broth culture, swirl the swab a few times, then withdraw the loop. Do not set the loop down. Replace the cap of your S. marcesens tryptic soy broth culture and set it aside in the tube rack.
9. Remove the cap from the sterile tryptic soy broth. Do not set the cap down.
10. While holding the tube at an angle, insert the loop and stir gently. You just inoculated the tryptic soy broth (you added a sample of your S. marcesens broth culture). Remove the loop. Place the used loop in the inoculating tools disposal cup/bottle. Allow the used loop in the inoculating tools disposal cup/bottle to soak for at least 30 minutes before discarding it in the trash. Used alcohol can be poured down the drain. Allow the water to run for at least 30 seconds to dilute the alcohol.
11. Screw the cap of the newly inoculated tryptic soy broth culture to the point of finger tightness, then backwards about one quarter of a turn. This will leave the cap just loose enough that air (but not contaminants) can enter the tube. Set the newly inoculated tryptic soy broth tube in the tube rack for incubation.
12. Take a photo with your photo ID of the inoculated tryptic soy broth. This photo will be pasted into the Aseptic Technique Questions Document.
13. Incubate the inoculated tryptic soy broth for 3 days in a consistently warm location (not to exceed 37 °C or 100 °F) out of direct sunlight.
Aseptic transfer from broth culture to sterile slant pROCEDURE
1. Remove one sterile swab from its packaging by the wooden handle. Peel the paper cover from the wooden end of the swab. Handle ONLY the wooden end of the swab to maintain the sterility of the cotton end. Do not set the swab down. Hold it in your dominant hand.
2. Remove the cap from your S. marcescens tryptic soy broth culture. Remember, do not set the cap down. Hold it in the pinky of your dominant hand while holding the tube in your non-dominant hand.
3. Holding the tub at an angle, insert the sterile swab to obtain an inoculum of your S. marcesens culture. Withdraw the swab, do not set the swab down. Replace the cap. Set your S. marcescens tryptic soy broth culture aside in the tube rack.
4. Remove the cap from the tryptic soy slant. Do not set the cap down.
5. Hold the inoculating swab like a pencil instead of a hammer. The motion of moving the swab comes from the action of your fingers and wrist, rather than from the elbow. While holding the tube at an angle, insert the swab and touch it to the bottom of the slant. Do not gouge the swab into the agar. Draw the swab back out of the tube, dragging it from side to side across the entire surface of the agar. This is known as “fishtail” inoculation because the way the swab is moved side to side is reminiscent of the tail movements of a swimming fish. Remove the swab. Place the used swab in the disposal cup/bottle. Allow the used swab in the inoculating tools disposal cup/bottle to soak for at least 30 minutes before discarding it in the trash. Used alcohol can be poured down the drain. Allow the water to run for at least 30 seconds to dilute the alcohol.
6. Screw the cap to the point of finger tightness, then backwards about one quarter of a turn. This will leave the cap just loose enough that air (but not contaminants) can enter the tube. Set the newly inoculated tryptic soy slant in the tube rack for incubation.
7. Take a photo with your photo ID of the inoculated tryptic soy slant. This photo will be pasted into the Aseptic Technique Questions Document.
8. Incubate the inoculated tryptic soy slant for 3 days in a consistently warm location (not to exceed 37 °C or 100 °F) out of direct sunlight.
PLEASE NOTE THE CONTENTS OF THE LAB KIT HAVE CHANGED. IN THE DEMONSTRATION VIDEO BELOW A NUTRIENT AGAR IS USED. YOU WILL USE TRYPTIC SOY AGAR INSTEAD OF A NUTRIENT AGAR.
aseptic transfer from broth culture to sterile agar plate procedure
1. Remove one sterile swab from its packaging by the wooden handle. Peel the paper cover from the wooden end of the swab. Handle ONLY the wooden end of the swab to maintain the sterility of the cotton end. Do not set the swab down. Hold it in your dominant hand.
2. Remove the cap from your S. marcescens tryptic soy broth culture. Remember, do not set the cap down. Hold it in the pinky of your dominant hand while holding the tube in your non-dominant hand.
3. Holding the tub at an angle, insert the sterile swab to obtain an inoculum (sample) of your S. marcesens tryptic soy culture. Withdraw the swab, do not set the swab down. Set your S. marcescens tryptic soy broth culture aside in the tube rack.
4. Lift the lid of the tryptic soy agar plate slightly. Do not remove the lid completely, and do not set the lid down. Use the lid as a shield to protect the agar from contamination by airborne microorganisms.
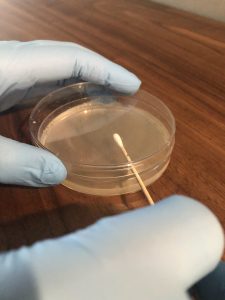
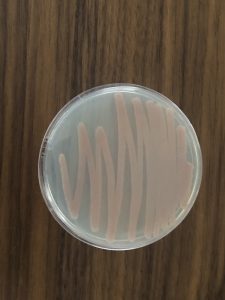
5. Touch the swab gently to the surface of the agar. Drag the swab over the surface of the agar in a zigzag pattern. Take care not to gouge the agar. Close the lid immediately after you inoculate the plate. Invert the plate (turn it lid side down) for incubation. This will prevent condensation from disrupting microbial growth.

6. Place the used inoculating swab in the disposal cup/bottle. Allow the used swab in the inoculating tools disposal cup/bottle to soak for at least 30 minutes before discarding it in the trash. Used alcohol can be poured down the drain. Allow the water to run for at least 30 seconds to dilute the alcohol.
7. Take a photo with your photo ID of the inoculated tryptic soy agar plate. This photo will be pasted into the Aseptic Technique Questions Document.
8. Invert the inoculated tryptic soy agar plate (lid side down), this will prevent condensation from disrupting microbial growth. Incubate the plate for 3 days in a consistently warm location (not to exceed 37 °C or 100 °F) out of direct sunlight.
9. Screw the cap of your S. marcescens tryptic soy broth culture to the point of finger tightness, then backwards about one quarter of a turn. This will leave the cap just loose enough that air (but not contaminants) can enter the tube.
10. Store your Serratia marcescens tryptic soy broth culture from part one of this lab exercise in the 250 ml beaker or a cup in the refrigerator.
11. Disinfect your work area with 10% bleach solution. Wash your lab bench with soap and water to remove the bleach residue. wash your hands thoroughly with soap and water. Dry your hands with paper towel.
AFTER 3 DAY INCUBATION
1. After the 3 day incubation, wash your hands thoroughly with soap and water. Dry your hands with paper towels. Put on your PPE (gloves, safety goggles, apron).
2. Prepare your surface disinfectant. Add 180 ml of tap water to the 250 ml beaker. Now add 20 ml of bleach to the 250 ml beaker. Your surface disinfectant (10% bleach solution) is now ready to use.
3. Disinfect the work surface, tube rack, and grease pencil or permanent marker with surface disinfectant by applying 10% bleach solution with a paper towel, allowing it to remain damp for 2 minutes, and then wiping away any remaining disinfectant with a dry paper towel. Throw the used paper towels in the trash.
4. Prepare for culture disinfection by filling a large, disposable, plastic container half full with surface disinfectant (10% bleach solution).
5. Growth in the broth will cause the broth to appear cloudy when compared to a sterile broth. Take a photo with your photo ID of the tryptic soy broth culture. The growth in the broth must be clearly visible in the photo. Do not remove the cap from the broth to take photo. Avoid the use of the flash, which will simply be reflected off of the lid. You may need to experiment with lighting conditions and camera angles to get the best pictures in your work space. This photo will be pasted into the Aseptic Technique Questions Document.
6. Record your aseptic transfer results in Table 2 in the Aseptic Technique Questions document.
7. If you have growth on the S. marcescens stock slant or stock plate, you can dispose of the S. marcescens tryptic soy broth cultures from part one and part two of this lab exercise. If you do not have growth on your S. marcescens slant or stock plate please email your professor for guidance, do not dispose of the S. marcescens tryptic soy broth cultures from part one and part two of this lab at this time. To dispose of the broth cultures, immerse the S. marcescens tryptic soy broth cultures (the one stored in your refrigerator and the one you just recorded the data on) into the culture disinfection container and remove the cap. Allow the culture to soak in the bleach for at least 24 hours. After the culture has soaked for at least 24 hours while wearing your PPE, pour the 10% bleach down the drain with the faucet running. Let the faucet continue to run for at least 30 seconds to dilute the bleach. Place the disinfected tube in a sealed plastic bag, and discard in the trash. Be sure to wash your hands after removing your gloves.
Do not dispose of the S. marcescens tryptic soy slant and S. marcescens tryptic soy agar plate. You will keep them as stock cultures.
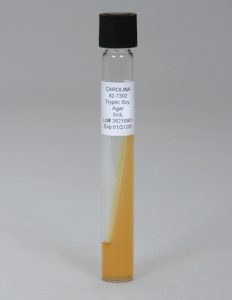
7. Growth on the slant will appear as a haze on the surface of the slant. Take a photo with your photo ID of the tryptic soy slant culture. The growth on the slant must be clearly visible in the photo. Do not remove the cap from the slant to take photo. Avoid the use of the flash, which will simply be reflected off of the lid. You may need to experiment with lighting conditions and camera angles to get the best pictures in your work space. This photo will be pasted into the Aseptic Technique Questions Document.
8. Record your aseptic transfer results in Table 2 in the Aseptic Technique Questions document.
9. Growth on the plate will appear in the zigzag pattern of inoculation. Take a photo with your photo ID of the tryptic soy agar plate culture. The growth on the plate must be clearly visible in the photo. Do not remove the lid of the Petri dish to take photos. Avoid the use of the flash, which will simply be reflected off of the lid. You may need to experiment with lighting conditions and camera angles to get the best pictures in your work space. This photo will be pasted into the Aseptic Technique Questions Document.
10. Record your aseptic transfer results in Table 2 in the Aseptic Technique Questions document.
Do not dispose of the S. marcescens tryptic soy stock slant and S. marcescens tryptic soy stock agar plate. You will keep them as stock cultures.
11. Do not dispose of the S. marcescens tryptic soy stock slant and S. marcescens tryptic soy agar stock plate. You will keep them as stock cultures. We will take samples from these stock cultures in future lab exercises. Place your S. marcescens stock plate lid side down in a sealed plastic bag and store it in the refrigerator. Screw the cap of your S. marcescens stock to the point of finger tightness, then backwards about one quarter of a turn. This will leave the cap just loose enough that air (but not contaminants) can enter the tube. Store your S. marcescens stock slant in the 250 ml beaker or a cup in the refrigerator.
12. Disinfect your work area with 10% bleach solution. Wash your lab bench with soap and water to remove the bleach residue. wash your hands thoroughly with soap and water. Dry your hands with paper towel.
discoveries in microbiology
FANNY HESSE
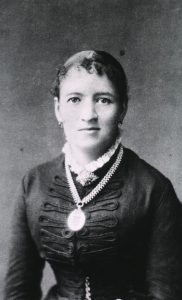 U.S. born Fanny Hesse worked as an unpaid illustrator for her husband, Walther Hesse, who was a laboratory technician for German microbiologist Robert Koch. One day in 1881, while eating lunch, Walter asked Fanny about the jellies and puddings that she made and how they managed to stay gelled even in warm weather. Fannie told him about how she learned about the seaweed product, agar, from a Dutch neighbor of hers while she was growing up in New York City. Her neighbor had emigrated from Indonesia, where it was the local custom to use agar in their cooking. Fannie suggested that they try this out in their laboratory. Solid media allowed Koch to isolate the bacteria that caused tuberculosis, but Hesse never received credit for her contribution.