
BIOCHEMICAL TESTING
LEARNING OBJECTIVES
Perform the catalase test and the oxidase test.
Describe how the catalase test works and interpret results of the test.
Describe how the oxidase test works and interpret results of the test.
MCCCD OFFICIAL COURSE COMPETENCIES
Describe the modes of bacterial and viral reproduction and proliferation.
Utilize aseptic technique for safe handling of microorganisms.
Apply various laboratory techniques to identify types of microorganisms.
Identify structural characteristics of the major groups of microorganisms.
Compare and contrast prokaryotic cell and eukaryotic cell.
Compare and contrast the physiology and biochemistry of the various groups of microorganisms.
INCUBATION TIMES
Part One Activating Staphylococcus epidermidis 3 days
Part Two Staphylococcus epidermidis stocks 3 days
PHOTO REQUIRMENTS
Take a photo with your photo ID during the lab exercises when you see this icon.

Paste these photos into the Streak Plate Questions Document.
INTRODUCTION
Microorganisms metabolize protein, carbohydrates, and lipids to produce energy in much the same way that humans do. Their ability to metabolize these macromolecules is dependent on their ability to produce the specific enzymes that catalyze the biochemical reactions. Since enzymes are proteins, a cell’s genetic code will determine what enzymes an organism can produce. Since the genetic code is not the same in all microorganisms, microorganisms will differ in their ability to produce specific enzymes.
When a microorganism produces an enzyme and a metabolic biochemical reaction occurs, end products will be produced. We can test for the presence of enzymes by studying these biochemical processes and detecting the products of the reactions.
Substrate—–enzyme—–> End Product
The catalase test is a common technique to identify microorganisms that produce ATP aerobically. A potential side effect of producing ATP aerobically is the incomplete reduction of oxygen to hydrogen peroxide (H2O2) and the superoxide ion (O2-). These toxic oxygen products can be very damaging to cells. They produce destructive free radicals that can attack lipids, DNA, and other essential cell components. Organisms that produce ATP aerobically have neutralizing enzymes to deal with these free radical generators, including superoxide dismutase and catalase. Obligate anaerobes die in the presence of oxygen because they lack the enzymes needed to break down toxic forms of oxygen and their intermediate byproducts. They produce ATP via anaerobic energy production or fermentation.
Catalase is used to breakdown H2O2 into H2O and O2:
2H2O2 —catalase—> 2H2O + 02
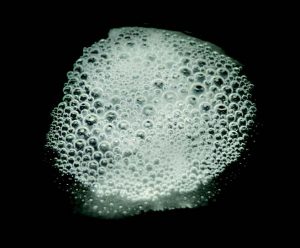
When a colony of cells is exposed to H2O2, the gaseous O2 generated during the catalase reaction can be visualized as bubbles forming around the colony. In the catalase test, these bubbles are used as an indicator of the presence of catalase in a sample of microorganisms. In this lab exercise, you will expose bacterial samples to H2O2 and look for evidence of catalase action.
The electron transport chain (ETC) is the final step for bacteria to produce ATP via aerobic and anaerobic energy production. Both aerobic and anaerobic energy production use glycolysis, the Kreb’s cycle, and the ETC to produce ATP. They differ in what is acting as the final electron acceptor in the ETC. Aerobic energy production uses oxygen as the final member of the ETC. Anaerobic energy production uses inorganic compounds (nitrate, sulfate) as the final member of the ETC. The enzyme that is part of the ETC that transfers the electrons to the final member of the ETC varies. It is cytochrome oxidase in bacteria that produce ATP aerobically. It is a reductase in bacteria that produce ATP anaerobically.
Microbiologists can distinguish between bacteria that have cytochrome oxidase and those that have a reductase by performing an oxidase test. The oxidase test uses an artificial electron donor reagent called tetramethyl-p-phenylenediamine dihydrochloride (TMPD or Wurster’s blue). When the reagent is oxidized by cytochrome oxidase it changes from colorless to purple/blue within 30 seconds. If the bacteria contain a reductase, the reagent is not oxidized and will remain colorless. Observe for a color change (colorless to purple/blue) within 30 seconds. A color change after 30 seconds does not indicate a positive result.
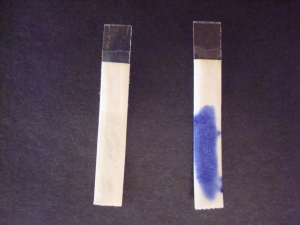
In this experiment, you will use a paper strip impregnated with TMPD to determine if bacterial samples are oxidase positive (they contain cytochrome oxidase) or oxidase negative (they contain a reductase).
SAFETY
This investigation requires safety goggles, gloves, a lab apron, and proper attire. Read all the instructions for this laboratory exercise before beginning. Follow the instructions closely and observe established laboratory safety practices as outlined in the Safety exercise. Email your instructor with any questions.
 Isopropyl alcohol is flammable. Keep containers of isopropyl alcohol away from any heat or flame sources.
 Chlorine bleach is a corrosive material. Use these materials near a source of running water that can be used as a safety eye wash or safety shower if any corrosive material comes in contact with skin or eyes. Do not use bleach in an area without proper ventilation.
part one-activating STAPHYLOCOCCUS EPIDERMIDIS
| PROPER ATTIRE AND REQUIRED PERSONAL PROTECTIVE EQUIPMENT (PPE) |
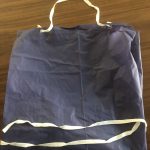
| Laboratory safety apron (from the lab kit). Wear a long-sleeve shirt under the lab apron.
|
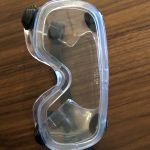
| Safety goggles (from the lab kit)
|
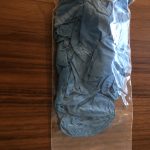
| Disposable gloves (from the lab kit)
|
| Closed-toe shoes that are solid, not made of cloth, not perforated (no ballet flats). To reduce exposure of your body, wear long pants, no skin can be showing, so you may have to wear socks with your shoes. A skirt can be worn but it must fit close to the body and again no skin can be showing. Long hair should be fastened and dangling jewelry or loose hanging garments or sleeves should not be worn. They may contaminate microbial cultures. Avoid loose or dangling clothing or jewelry that could catch on objects or interfere with the lab exercise. |
| REQUIRED SUPPLIES FROM THE LAB KIT |
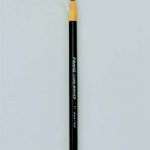
| Grease pencil
|
| Tube rack
|
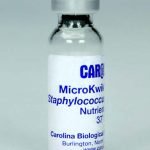
Staphylococcus epidermidis lyophilized culture (stored in the refrigerator)
|
| Tryptic soy broth (1) (stored in the refrigerator) Do not remove the cap!
Allow media that have been stored in the refrigerator to sit at room temperature in the tube rack for 60 minutes prior to use
|
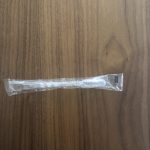
| Sterile transfer pipette (2) Do not remove from the package!
|


| REQUIRED SUPPLIES YOU PROVIDE |
| Bleach |
| Isopropyl alcohol |
| Paper towels |
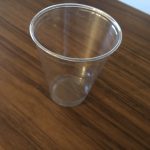
| Small disposable plastic container (plastic cup or empty water bottle) filled half way with 70% isopropyl alcohol for disinfect inoculating tools (for lab use only)
|
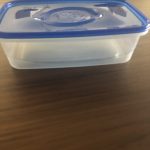
| Large disposable plastic container filled half way with 10% bleach solution for disinfecting cultures (for lab use only)
|
| Resealable plastic bag (sandwich or quart size) |
| Timer or stopwatch, or resealable plastic bag to protect your cell phone if using it as a timer |
| Cell phone or digital camera to take digital photos |
PLEASE NOTE THE CONTENTS OF THE LAB KIT HAVE CHANGED. IN THE DEMONSTRATION VIDEO BELOW NUTRIENT BROTH IS USED. YOU WILL USE TRYPTIC SOY BROTH INSTEAD OF NUTRIENT BROTH.
Read all instructions carefully before you start the experiment. Wear proper attire when performing laboratory experiments. Allow media that have been stored in the refrigerator to sit at room temperature for 60 minutes prior to use. Read each step carefully and watch any accompanying video. Think about what you are going to do before you do it. Once you begin, move with purpose and focus.
1. Wash your hands thoroughly with soap and water. Dry your hands with paper towel. Put on your PPE (gloves, safety goggles, apron).
2. Prepare your surface disinfectant. Add 180 ml of tap water to the 250 ml beaker. Now add 20 ml of bleach to the 250 ml beaker. Your surface disinfectant (10% bleach solution) is now ready to use.
3. Disinfect the work surface, tube rack, and grease pencil or permanent marker with surface disinfectant by applying 10% bleach solution with a paper towel, allowing it to remain damp for 2 minutes, and then wiping away any remaining disinfectant with a dry paper towel. Throw the used paper towels in the trash.
4. Prepare for inoculating tool disinfection by filling a small, disposable, plastic container (8 ounce or larger plastic cup or empty water bottle) half full with isopropyl alcohol. Prepare for culture disinfection by filling a large, disposable, plastic container two thirds of the way with surface disinfectant (10% bleach solution).
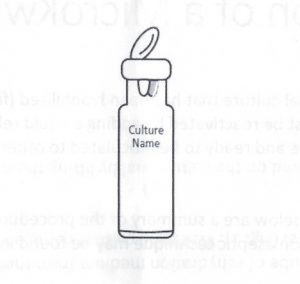
5. In this lab exercise, we will be using an Staphylococcus epidermidis ( S. epidermidis) culture that has been lyophilized (freeze-dried) to prolong its shelf life. You will rehydrate the lyophilized culture with medium with nutrient broth, and then incubate the rehydrated culture to allow the bacteria to increase in number via binary fission. Retrieve one tryptic soy broth tube from the refrigerator. Place the tube in the disinfected tube rack on the disinfected work surface. Allow the tube to sit 60 minutes at room temperature prior to use.
6. Using the grease pencil or permanent marker, label the tryptic soy broth with the name of the organism (S. epi) and the date.
7. Carefully remove the metal band from the S. epidermidis culture vial by lifting the metal circle in the center and then pulling to one side. There is an arrow on the top of the metal band, lift there. The metal band may be discarded in the trash.
8. Remove the sterile pipette from its wrapping by the bulb end. DO NOT set the pipette down; instead, hold it in your dominant hand.
9. Using the pinky finger of your dominant hand (or your pinky and ring fingers), remove the cap from the nutrient broth. DO NOT set the cap down. Hold it with your pinky while the tube is open.
10. Holding the tube at an angle, insert the pipette tip to obtain 1 ml of tryptic soy broth (there are markings on the stem of the pipette to measure 1ml). Replace the cap. Set the nutrient broth tube in the tube rack.
11. Using your non-dominant hand, remove the rubber stopper from the lyophilized S. epidermidis culture vial.
12. Dispense 1 ml of tryptic soy broth into the lyophilized S. epidermidis. Use the transfer pipette to stir the contents of the vial, breaking up the lyophilized pellet. Replace the rubber stopper and wait for 1 minute. Place the used transfer pipette in the inoculating tools disposal cup/bottle and let it soak for at least 30 minutes before discarding it in the trash. Used alcohol can be poured down the drain. Allow the water to run for at least 30 seconds to dilute the alcohol.
13. Remove the cap from the nutrient broth, do not set the cap down.
14. Use a new sterile transfer pipette to transfer the rehydrated S. epidermidis from the vial to the tube of tryptic soy broth and replace the cap. Set the tube in the tube rack. Screw the cap to the point of finger tightness, then backwards about one quarter of a turn. Set the newly inoculated tryptic soy broth tube in the tube rack for incubation. This will become your S. epidermidis tryptic soy broth culture after it is incubated.
15. Place the used transfer pipette in the inoculating tools disposal cup/bottle and let it soak for at least 30 minutes before discarding it in the trash. Used alcohol can be poured down the drain. Allow the water to run for at least 30 seconds to dilute the alcohol.
16. Place the S. epidermidis vial and rubber cap into the culture disposal container. Allow them to soak at least 24 hours before placing them in a sealed plastic bag and disposing of them in the trash. Pour the 10% bleach down a drain and flush with excess water for at least 30 seconds to dilute the bleach.
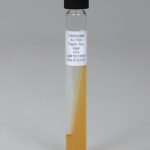
17. Take a photo with your photo ID of the rehydrated S. epidermidis culture in tryptic soy broth. This photo will be pasted into the Biochemical Testing Questions Document.
18. Incubate the tube for 3 days in a consistently warm location (not to exceed 37 °C or 100 °F) out of direct sunlight.
19. Disinfect your work area with 10% bleach solution. Wash your lab bench with soap and water to remove the bleach residue. wash your hands thoroughly with soap and water. Dry your hands with paper towel.
after 3 day incubation
Read all instructions carefully before you start the experiment. Wear proper attire when performing laboratory experiments.
1. After the 3 day incubation, wash your hands thoroughly with soap and water. Dry your hands with paper towels. Put on your PPE (gloves, safety goggles, apron).
2. Prepare your surface disinfectant. Add 180 ml of tap water to the 250 ml beaker. Now add 20 ml of bleach to the 250 ml beaker. Your surface disinfectant (10% bleach solution) is now ready to use.
3. Disinfect the work surface, tube rack, and grease pencil or permanent marker with surface disinfectant by applying 10% bleach solution with a paper towel, allowing it to remain damp for 2 minutes, and then wiping away any remaining disinfectant with a dry paper towel. Throw the used paper towels in the trash.
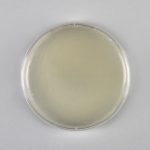
4. Take a photo with your photo ID of your S. epidermidis tryptic soy broth culture. The growth must be clearly visible in the photo. Do not remove the cap to take the photo. You may need to experiment with lighting conditions and camera angles to get the best pictures in your work space. This photo will be pasted into the Biochemical Testing Questions Document.
5. DO NOT dispose of your S. epidermidis tryptic soy broth culture! You will use it in PART TWO of this lab exercise.
6. Begin PART TWO Now!
part two- staphylococcus epidermidis stocks
| REQUIRED SUPPLIES FROM THE LAB KIT |
| Sterile swab (2) Do not remove from the package!
|
| Tryptic soy agar plate (1) (stored in the refrigerator) Do not remove the lid!
PLEASE USE A TRYPTIC AGAR PLATE. DO NOT USE ONE OF THE OTHER AGAR PLATES! Allow media that have been stored in the refrigerator to sit at room temperature for 60 minutes prior to use
|
| Tryptic soy slant (1) (stored in the refrigerator) Do not remove the cap!
DO NOT USE A TRIPLE SUGAR IRON AGAR SLANT. PLEASE MAKE SURE YOU ARE USING TRYPTIC SOY AGAR SLANT!! Allow media that have been stored in the refrigerator to sit at room temperature in the tube rack for 60 minutes prior to use
|
| Tube rack
|
| Grease pencil
|
| REQUIRED SUPPLIES YOU PROVIDE |
| Staphylococcus epidermidis tryptic soy broth cultures from PART ONE of this lab exercise |
| Bleach |
| Isopropyl alcohol |
| Paper towels |
| Small disposable plastic container (plastic cup or empty water bottle) filled two thirds of the way with 70% isopropyl alcohol for disinfect inoculating tools (for lab use only)
|
| Large disposable plastic container filled two thirds of the way with 10% bleach solution for disinfecting cultures (for lab use only)
Prepare after 3 day incubation
|
| Timer or stopwatch, or resealable plastic bag to protect your cell phone if using it as a timer |
| Cell phone or digital camera to take digital photos |
| Fine tip permanent marker to be used instead of grease pencil (optional) |
Staphylococcus epidermidis STOCK slant PROCEDURE
1. Using the grease pencil or permanent marker, label the tryptic soy slant with the name of the organism (S. epi), stock, and the date.
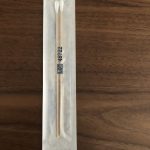
2. Peel the paper cover from the wooden end of the swab. Peel the paper cover from the wooden end of the swab. Handle ONLY the wooden end of the swab to maintain the sterility of the cotton end. Remove one sterile swab from its packaging. Do not set the swab down. Hold it in your dominant hand.
3. Remove the cap from your S. epidermidis tryptic soy broth culture. Remember, do not set the cap down. Hold it in the pinky of your dominant hand while holding the tube in your non-dominant hand.
4. Holding the tub at an angle, insert the sterile swab to obtain an inoculum of your S. epidermidis tryptic soy broth culture. Withdraw the swab, do not set the swab down. Replace the cap. Set your S. epidermidis tryptic soy broth culture aside in the tube rack.
5. Remove the cap from the tryptic soy slant. Do not set the cap down.
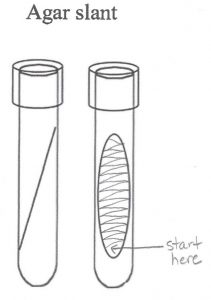
6. Hold the swab like a pencil instead of a hammer. The motion of moving the swab comes from the action of your fingers and wrist, rather than from the elbow. While holding the tube at an angle, insert the swab and touch it to the bottom of the slant. Do not gouge the swab into the agar. Draw the swab back out of the tube, dragging it from side to side across the entire surface of the agar. This is known as “fishtail” inoculation because the way the swab is moved side to side is reminiscent of the tail movements of s swimming fish. Remove the swab.
7. Screw the cap to the point of finger tightness, then backwards about one quarter of a turn. Set the newly inoculated tryptic soy slant in the tube rack for incubation.
8. Take a photo with your photo ID of the S. epidermidis stock slant culture. The photo will be pasted into the Biochemical Testing Questions Document.
9. Place the used swab in the inoculating tools disposal cup/bottle and let is soak for at least 30 minutes before discarding it in the trash. Used alcohol can be poured down the drain. Allow the water to run for at least 30 seconds to dilute the alcohol.
Staphylococcus epidermidis Stock Plate procedure
1. Using the grease pencil or permanent marker, label the outside of the bottom half (the half that contains the media) of the tryptic soy agar plate with the name of the organism (S. epi), stock, and the date.
2. Peel the paper cover from the wooden end of the swab. Peel the paper cover from the wooden end of the swab. Handle ONLY the wooden end of the swab to maintain the sterility of the cotton end. Remove one sterile swab from its packaging. Do not set the swab down. Hold it in your dominant hand.
3. Remove the cap from your S. epidermidis tryptic soy broth culture. Remember, do not set the cap down. Hold it in the pinky of your dominant hand while holding the tube in your non-dominant hand.
4. Holding the tub at an angle, insert the sterile swab to obtain an inoculum (sample) of your S. epidermidis culture. Withdraw the swab, do not set the swab down. Set your S. epidermidis tryptic soy broth culture aside in the tube rack.
5. Lift the lid of the tryptic soy agar plate slightly. Do not remove the lid completely, and do not set the lid down. Use the lid as a shield to protect the agar from contamination by airborne microorganisms.
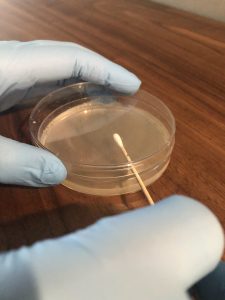

6. Touch the swab gently to the surface of the agar. Drag the swab over the surface of the agar in a zigzag pattern. Take care not to gouge the agar. Close the lid immediately after you inoculate the plate. Invert the plate (turn it lid side down) for incubation. This will prevent condensation from disrupting microbial growth.
7. Place the used swab in the inoculating tools disposal cup/bottle and let it soak for at least 30 minutes before discarding it in the trash. Used alcohol can be poured down the drain. Allow the water to run for at least 30 seconds to dilute the alcohol.
8. Take a photo with your photo ID of the S. epidermidis stock plate culture. The photo will be pasted into the Biochemical Testing Questions Document.
9. Incubate the tube and plate (lid side down) for 3 days in a consistently warm location (not to exceed 37 °C or 100 °F) out of direct sunlight.
10. Screw the cap of your S. epidermidis tryptic soy broth culture to the point of finger tightness, then backwards about one quarter of a turn. Store your S. epidermidis tryptic soy broth culture in the 250 ml beaker or a cup in the refrigerator.
11. Disinfect your work area with 10% bleach solution and wash your hands thoroughly with soap and water. Dry your hands with paper towel.
AFTER 3 DAY INCUBATION
1. After the 3 day incubation, wash your hands thoroughly with soap and water. Dry your hands with paper towels. Put on your PPE (gloves, safety goggles, apron).
2. Prepare your surface disinfectant. Add 180 ml of tap water to the 250 ml beaker. Now add 20 ml of bleach to the 250 ml beaker. Your surface disinfectant (10% bleach solution) is now ready to use.
3. Disinfect the work surface, tube rack, and grease pencil or permanent marker with surface disinfectant by applying 10% bleach solution with a paper towel, allowing it to remain damp for 2 minutes, and then wiping away any remaining disinfectant with a dry paper towel. Throw the used paper towels in the trash.
4. Prepare for culture disinfection by filling a large, disposable, plastic container half way with 10% bleach solution.
5. Take a photo with your photo ID of the S. epidermidis stock slant culture. The growth must be clearly visible in the photo. Do not remove the cap from the slant to take photos. Avoid the use of the flash, which will simply be reflected off of the lid. You may need to experiment with lighting conditions and camera angles to get the best pictures in your work space. The photo will be pasted into the Biochemical Testing Questions Document.
6. Take a photo with your photo ID of the S. epidermidis stock plate culture. The growth must be clearly visible in the photo. Do not remove the lid of the Petri dish to take photos. Avoid the use of the flash, which will simply be reflected off of the lid. You may need to experiment with lighting conditions and camera angles to get the best pictures in your work space. The photo will be pasted into the Biochemical Testing Questions Document.
7. You will use your S. epidermidis stock plate or stock slant in PART THREE of this lab exercise AND you will keep them as stock cultures. If you do not have growth on your S. epidermidis stock slant or S. epidermidis stock plate, please email your professor for guidance, do not dispose of the S. epidermidis tryptic soy broth cultures at this time. If you have growth on the S. epidermidis stock slant and S. epidermidis stock plate, immerse the S. epidermidis tryptic soy broth culture stored in the refrigerator into the culture disinfection container and remove the cap. Allow the culture to soak in the bleach for at least 24 hours. After the culture has soaked for at least 24 hours while wearing your PPE, pour the 10% bleach down the drain with the faucet running. Let the faucet continue to run for at least 30 seconds to dilute the bleach. Place the disinfected tube in a sealed plastic bag, and discard in the trash. Be sure to wash your hands after removing your gloves.
8. Use your S. epidermidis stock plate or slant in PART THREE of this lab exercise.
9. BEGIN PART THREE NOW!
part three- catalase test and oxidase test
| REQUIRED SUPPLIES FROM THE LAB KIT |
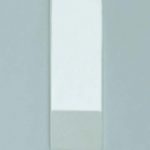
| Slides (2)
|
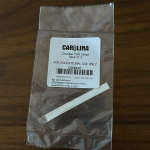
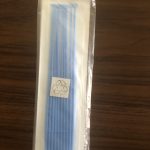
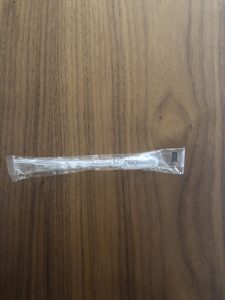
| Oxidase strips (3) (stored in the refrigerator) DO NOT TOUCH THE OXIDASE STRIPS WITHOUT GLOVES ON!
|
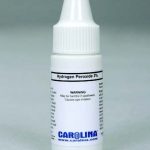
| Hydrogen peroxide (stored in the refrigerator)
|
| Sterile inoculating loops (6) Do not remove from the package!
|
| Sterile Transfer Pipette (3)
|
| Grease pencil
|
| Tube rack
|
| REQUIRED SUPPLIES YOU PROVIDE |
| Staphylococcus epidermidis stocks slant or stock plate from Part Two of this lab exercise |
| Serratia marcescens stock slant or stock plate (stored in the refrigerator) |
| Escherichia coli stock slant or stock plate (stored in the refrigerator) |
| Sheet of paper |
| Bottled water (3 drops) |
| Small disposable plastic container (plastic cup or empty water bottle) filled half way with 70% isopropyl alcohol for disinfect inoculating tools (for lab use only)
|
| Timer or stopwatch, or resealable plastic bag to protect your cell phone if using it as a timer |
| Cell phone or digital camera to take digital photos |
| Fine tip permanent marker to be used instead of grease pencil (optional) |
catalase test procedure
Experiment Video Guide
1. Prepare for inoculating tool disinfection by filling a small, disposable, plastic container (8 ounce or larger plastic cup or empty water bottle) half full with isopropyl alcohol. Prepare for culture disinfection by filling a large, disposable, plastic container half way with surface disinfectant (10% bleach solution).
2. Draw a line down the center of each slide with the grease pencil or permanent marker. Label half of one slide E. coli, label the other half S. epi. Label half of the other slide Serratia, label the other half control. We will use your stock slants or stock plates to obtain an inoculum (sample) of each bacteria. You will not add an inoculum to the control. You will use aseptic transfer to transfer the inoculum to the slides. You will then test the inoculum for the catalase enzyme.
3. Remove a sterile loop from its packaging. You will use either your S. marcescens stock plate or slant to obtain a sample for subculturing.
If you obtaining an inoculum (sample) from your Serratia marcescens tryptic soy stock slant:
Remove the cap from your S. marcescens tryptic soy slant stock. Remember do not set the cap down. Hold it in the pinky of your dominant hand while holding the tube in your non-dominant hand.
Holding the tube at an angle, insert the inoculating loop to obtain an inoculum (a sample) about the size of a pinhead of your S. marcescens tryptic soy slant stock, then withdraw the loop. Do not set the loop down. Replace the cap of your tryptic soy slant stock and set it aside in the tube rack.
If you are obtaining an inoculum (sample) from your S. marcescens tryptic soy stock plate:
Lift the lid of the tryptic soy agar plate slightly. Do not remove the lid completely, and do not set the lid down. Use the lid as a shield to protect the agar from contamination by airborne microorganisms.
Insert the inoculating loop to obtain an inoculum (sample) about the size of a pinhead of your S. marcescens tryptic soy agar stock plate. Withdraw the loop, do not set the loop down. Replace the lid. Set the plate aside.
4. Place the inoculum in the center of the half of the slide labeled Serratia.
5. Place the used inoculating loop in the inoculating tools disposal cup/bottle. Allow the used loops in the inoculating tools disposal cup/bottle to soak for at least 30 minutes before discarding it in the trash. Used alcohol can be poured down the drain. Allow the water to run for at least 30 seconds to dilute the alcohol.
6. Remove a sterile loop from its packaging. You will use either your Staphylococcus epidermidis stock plate or slant to obtain a sample for subculturing.
If you are obtaining an inoculum (sample) from your S. epidermidis tryptic soy stock slant:
Remove the cap from your S. epidermidis tryptic soy slant stock. Remember do not set the cap down. Hold it in the pinky of your dominant hand while holding the tube in your non-dominant hand.
Holding the tube at an angle, insert the inoculating loop to obtain an inoculum (a sample) about the size of a pinhead of your S. epidermidis tryptic soy slant stock, then withdraw the loop. Do not set the loop down. Replace the cap of your tryptic soy slant stock and set it aside in the tube rack.
If you are obtaining an inoculum (sample) from your S. epidermidis tryptic soy stock plate:
Lift the lid of the tryptic soy agar plate slightly. Do not remove the lid completely, and do not set the lid down. Use the lid as a shield to protect the agar from contamination by airborne microorganisms.
Insert the inoculating loop to obtain an inoculum (sample) about the size of a pinhead of your S. epidermidis tryptic soy agar stock plate. Withdraw the loop, do not set the loop down. Replace the lid. Set the plate aside.
7. Place the inoculum in the center of the half of the slide labeled S. epi.
8. Place the used inoculating loop in the inoculating tools disposal cup/bottle. Allow the used loops in the inoculating tools disposal cup/bottle to soak for at least 30 minutes before discarding it in the trash. Used alcohol can be poured down the drain. Allow the water to run for at least 30 seconds to dilute the alcohol.
9. Remove a sterile loop from its packaging. You will use either your Escherichia coli stock plate or slant to obtain a sample for subculturing.
If you are obtaining an inoculum (sample) from your E. coli tryptic soy stock slant:
Remove the cap from your E. coli tryptic soy slant stock. Remember do not set the cap down. Hold it in the pinky of your dominant hand while holding the tube in your non-dominant hand.
Holding the tube at an angle, insert the inoculating loop to obtain an inoculum (a sample) about the size of a pinhead of your E. coli tryptic soy slant stock, then withdraw the loop. Do not set the loop down. Replace the cap of your tryptic soy slant stock and set it aside in the tube rack.
If you are obtaining an inoculum (sample) from your E. coli tryptic soy stock plate:
Lift the lid of the tryptic soy agar plate slightly. Do not remove the lid completely, and do not set the lid down. Use the lid as a shield to protect the agar from contamination by airborne microorganisms.
Insert the inoculating loop to obtain an inoculum (sample) about the size of a pinhead of your E. coli tryptic soy agar stock plate. Withdraw the loop, do not set the loop down. Replace the lid. Set the plate aside.
10. Place the inoculum in the center of the half of the slide labeled E. coli.
11. Place the used inoculating loop in the inoculating tools disposal cup/bottle. Allow the used loops in the inoculating tools disposal cup/bottle to soak for at least 30 minutes before discarding it in the trash. Used alcohol can be poured down the drain. Allow the water to run for at least 30 seconds to dilute the alcohol.
12. Carefully add one drop of hydrogen peroxide to the inoculum on the slides. Add one drop of hydrogen peroxide to the center of the half of the slide labeled control. Observe immediately for the development of bubbles. Record the result in the catalase data table in the Biochemical Testing Question document. Dispose of the hydrogen peroxide in the trash.
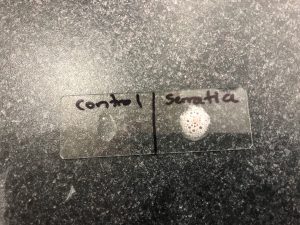
13. Take a photo with your photo ID of the catalase test results. This photo will be pasted into the Biochemical Testing Questions document.
14. Soak the slides in the disposal jar for at least 30 minutes before disposing of them in the trash.
oxidase test procedure
DO NOT TOUCH THE OXIDASE STRIPS WITHOUT GLOVES ON!
Experiment Video Guide
1. Divide a piece of paper into three sections. Label one section of the paper Serratia. Label one section of the paper S. epi. Label one section of the paper E. coli. We will use your stock slants or stock plates to obtain an inoculum (sample) of each bacteria. You will use aseptic transfer to transfer the inoculum to an oxidase strip to test for the oxidase enzyme.
2. Do not touch the oxidase strips without gloves on! Place one oxidase strip face up (look at the edges of the strip, they should be pointing down) on the section of the paper labeled Serratia.
3. Remove a sterile transfer pipette from its packaging. Use a sterile pipette to add one drop of bottled water onto the center of the oxidase strip. Do not over-moisten the strip!
4. Remove a sterile loop from its packaging. Aseptically obtain a loop of inoculum from the S. marcescens stock slant or plate culture.
If you are obtaining an inoculum (sample) from your S. marcescens tryptic soy stock slant:
Remove the cap from your S. marcescens tryptic soy slant stock. Remember do not set the cap down. Hold it in the pinky of your dominant hand while holding the tube in your non-dominant hand.
Holding the tube at an angle, insert the inoculating loop to obtain an inoculum (a sample) about the size of a pinhead of your S. marcescens tryptic soy slant stock, then withdraw the loop. Do not set the loop down. Replace the cap of your tryptic soy slant stock and set it aside in the tube rack.
If you are obtaining an inoculum (sample) from your S. marcescens tryptic soy stock plate:
Lift the lid of the tryptic soy agar plate slightly. Do not remove the lid completely, and do not set the lid down. Use the lid as a shield to protect the agar from contamination by airborne microorganisms.
Insert the inoculating loop to obtain an inoculum (sample) about the size of a pinhead of your S. marcescens tryptic soy agar stock plate. Withdraw the loop, do not set the loop down. Replace the lid. Set the plate aside.
5. Set your timer or stopwatch so you are ready to count seconds. Place the inoculum in the moist area of the oxidase strip. A positive oxidase test result is a color change to blue/purple within 30 seconds. Record the result in the oxidase data table in the Biochemical Testing Question document.
6. Take a photo with your photo ID of the oxidase test result. This photo will be pasted into the Biochemical Testing Questions document.
7. Place the used oxidase strip and used inoculating loop in the inoculating tools disposal cup/bottle. Allow the loop and oxidase strip in the inoculating tools disposal cup/bottle to soak for at least 30 minutes before discarding it in the trash. Used alcohol can be poured down the drain. Allow the water to run for at least 30 seconds to dilute the alcohol.
8. Do not touch the oxidase strips without gloves on! Place one oxidase strip face up (look at the edges of the strip, they should be pointing down) on the section of the paper labeled S. epi.
9. Remove a sterile transfer pipette from its packaging. Use a sterile pipette to add one drop of bottled water onto the center of the oxidase strip. Do not over-moisten the strip!
10. Remove a sterile loop from its packaging. Aseptically obtain a loop of inoculum from the Staphylococcus epidermidis stock slant or plate culture.
If you are obtaining an inoculum (sample) from your S. epidermidis tryptic soy stock slant:
Remove the cap from your S. epidermidis tryptic soy slant stock. Remember do not set the cap down. Hold it in the pinky of your dominant hand while holding the tube in your non-dominant hand.
Holding the tube at an angle, insert the inoculating loop to obtain an inoculum (a sample) about the size of a pinhead of your S. epidermidis tryptic soy slant stock, then withdraw the loop. Do not set the loop down. Replace the cap of your tryptic soy slant stock and set it aside in the tube rack.
If you are obtaining an inoculum (sample) from your S. epidermidis tryptic soy stock plate:
Lift the lid of the tryptic soy agar plate slightly. Do not remove the lid completely, and do not set the lid down. Use the lid as a shield to protect the agar from contamination by airborne microorganisms.
Insert the inoculating loop to obtain an inoculum (sample) about the size of a pinhead of your S. epidermidis tryptic soy agar stock plate. Withdraw the loop, do not set the loop down. Replace the lid. Set the plate aside.
11. Set your timer or stopwatch so you are ready to count seconds. Place the inoculum in the moist area of the oxidase strip. A positive oxidase test result is a color change to blue/purple in 20-30 seconds. Record the result in the oxidase data table in the Biochemical Testing Question document.
12. Take a photo with your photo ID of the oxidase test result. This photo will be pasted into the Biochemical Testing Questions document.
13. Place the used oxidase strip and used inoculating loop in the inoculating tools disposal cup/bottle. Allow the loop and oxidase strip in the inoculating tools disposal cup/bottle to soak for at least 30 minutes before discarding it in the trash. Used alcohol can be poured down the drain. Allow the water to run for at least 30 seconds to dilute the alcohol.
14. Do not touch the oxidase strips without gloves on! Place one oxidase strip face up (look at the edges of the strip, they should be pointing down) on the section of the paper labeled E. coli.
15. Remove a sterile transfer pipette from its packaging. Use a sterile pipette to add one drop of bottled water onto the center of the oxidase strip. Do not over-moisten the strip!
16. Remove a sterile loop from its packaging. Aseptically obtain a loop of inoculum from the E. coli stock slant or plate culture.
If you are obtaining an inoculum (sample) from your E. coli tryptic soy stock slant:
Remove the cap from your E. coli tryptic soy slant stock. Remember do not set the cap down. Hold it in the pinky of your dominant hand while holding the tube in your non-dominant hand.
Holding the tube at an angle, insert the inoculating loop to obtain an inoculum (a sample) about the size of a pinhead of your E. coli tryptic soy slant stock, then withdraw the loop. Do not set the loop down. Replace the cap of your tryptic soy slant stock and set it aside in the tube rack.
If you are obtaining an inoculum (sample) from your E. coli tryptic soy stock plate:
Lift the lid of the tryptic soy agar plate slightly. Do not remove the lid completely, and do not set the lid down. Use the lid as a shield to protect the agar from contamination by airborne microorganisms.
Insert the inoculating loop to obtain an inoculum (sample) about the size of a pinhead of your E. coli tryptic soy agar stock plate. Withdraw the loop, do not set the loop down. Replace the lid. Set the plate aside.
17. Set your timer or stopwatch so you are ready to count seconds. Place the inoculum in the moist area of oxidase strip. A positive oxidase test result is a color change to blue/purple in 20-30 seconds. Record the result in the oxidase data table in the Biochemical Testing Question document.
18. Place the used oxidase strip and used inoculating loop in the inoculating tools disposal cup/bottle. Allow the oxidase strip and loop in the inoculating tools disposal cup/bottle to soak for at least 30 minutes before discarding it in the trash. Used alcohol can be poured down the drain. Allow the water to run for at least 30 seconds to dilute the alcohol.
19. Take a photo with your photo ID of the oxidase test result. This photo will be pasted into the Biochemical Testing Questions document.
20. If you obtained the inoculum from your tryptic soy stock slant:
Screw the cap of your tryptic soy slant stock to the point of finger tightness, then backwards about one quarter of a turn. Store your tryptic soy slant stock in the 250 ml beaker or a cup in the refrigerator.
If you obtained your inoculum from your nutrient agar stock plate:
Store your stock plate lid side down in a sealed plastic bag and store it in the refrigerator.
21. Saturate the sheet of paper you performed the oxidase tests on with surface disinfectant and allow it to sit for at least 20 minutes before disposing of it in the trash.
22. Disinfect your work area with 10% bleach solution. Wash your lab bench with soap and water to remove the bleach residue. wash your hands thoroughly with soap and water. Dry your hands with paper towel.
discoveries in microbiology
DR. JOSEPH LISTER

In the 1800’s it was common to see the following note in a surgical report, “operation successful but the patient died”. In 1864-1866, before he developed antisepsis, 46% of British surgeon Dr. Joseph Lister’s surgical patients died of infection after surgery. Many people believed “bad air”, or miasma, was responsible for infection in surgical wounds. Hospital wards were often aired out at midday as a precaution against the spread of infection via miasma. Phenol (or carbolic acid) had been used preventing decay and neutralize the stench of dead animals and human cadavers. Frederick Calvert, Alexander McDougall, and Angus Smith used a powdered form of carbolic acid as a deodorizing agent to treat municipal sewage across the United Kingdom, most notably during London’s famous “Great Stink” of 1858. Dr. Lister read the work of Ignaz Semmelweis on hand washing and Pasteur’s work on spontaneous generation and fermentation. Dr. Lister was convinced that infection of surgical wounds was due to tiny living creatures in the air entering surgical wounds He instructed surgeons under his responsibility to wear sterilized gloves and wash their hands before and after operations with a 5% carbolic acid solution. Instruments were also washed in the same solution and assistants sprayed the solution in the operating room. One of his additional suggestions was to stop using porous natural materials in manufacturing the handles of medical instruments. After implementing his new technique (1867-1870), 15% of Dr. Lister’s patients died of infection after surgery. More fortunate than many pioneers, Dr. Lister saw the almost universal acceptance of his antisepsis techniques during his life. Dr. Lister’s work was an inspiration to others. Joseph Lawrence, a chemist living in Missouri, developed an alcohol-based formula for an antiseptic mouthwash in 1879 that he named “Listerine” in his honor.