
KIRBY-BAUER TEST
LEARNING OBJECTIVES
Perform and interpret Kirby-Bauer tests.
Differentiate between the Kirby-Bauer test and Minimal Inhibitory Concentration test.
List the five targets of antibiotics.
List the five ways bacteria resist antibiotics.
MCCCD OFFICIAL COURSE COMPETENCIES
Describe and compare the effectiveness of physical and chemical methods of microbial control.
Identify structural characteristics of the major groups of microorganism.
Compare and contrast prokaryotic cell and eukaryotic cells.
Compare and contrast the physiology and biochemistry of the various groups of microorganisms.
Apply various laboratory techniques to identify types of microorganisms.
Utilize aseptic technique for safe handling of microorganisms.
INCUBATION TIMES
Part One Subculturing Staphylococcus epidermidis and Escherichia coli 3 days
Part Two Kirby-Bauer Antibiotic Sensitivity Testing 3 days
NOTES
Allow media that have been stored in the refrigerator to sit at room temperature for 60 minutes prior to use.
PHOTO REQUIREMENTS
Take a photo with your photo ID during the lab exercises when you see this icon.

Paste these photos into the Kirby-Bauer Test Questions Document.
INTRODUCTION
Antibiotics are chemicals produced by some bacteria and fungi that, in small quantities, can inhibit the growth of bacteria. Much of the success we have achieved in treating infections since World War II is due to the discovery of antibiotics. Utilizing the information gleaned from studying these natural chemicals, scientists have artificially synthesized other useful antimicrobial chemicals in the laboratory. Sometimes these antimicrobials are completely synthesized in the lab (synthetic) and sometimes they are partly produced in nature and partly synthesized in the lab (semisynthetic).
Many microbes can produce antibiotics, but four genera produce most of the antibiotics used for treating human and animal infections. Bacillus and Streptomyces are bacteria. Penicillium and Cephalosporium are fungi. It is a constant challenge to develop new antibiotics to replace those antibiotics for which microbes have developed resistance. How do antibiotics kill bacteria?
The five targets of antibiotics are:
1. Inhibition cell wall synthesis by blocking the synthesis of peptidoglycan
2. Inhibition protein synthesis by targeting 70s ribosomes of bacteria
3. Inhibition of nucleic acid synthesis by targeting bacterial RNA polymerase, bacterial DNA gyrase
4. Disruption of membranes by disorganizing the structure of membranes or inhibiting membrane function
5. Blocking specific biochemical pathways inhibiting metabolism
The range of bacteria killed by an antibiotic determines its “spectrum of activity”. Antibiotics that are only effective against Gram-positive or only effective against Gram-negative bacteria have a narrow spectrum of activity. Antibiotics that are effective against many different types of bacteria are called broad spectrum antibiotics. Broad spectrum antibiotics are probably contributing to the escalating drug resistance we are seeing in microorganisms. Broad spectrum antibiotics often wipe out a person’s normal microbiome as well as the pathogen they are intended to kill, resulting in superinfections from organisms such as Candida albicans and Clostridium difficile that grow out of control when they do not have to compete with microbes in the normal microbiomes.
Empiric therapy takes place when an antimicrobial agent is given to the patient without performing a culture or other diagnostic test to determine the specific cause of the disease. Empiric therapy is prescribed in instances where the causative pathogen is likely and where diagnostic tests will not change the treatment. The selection of which drug to use is based solely on experience, observation and relevant clinical information including current resistance patterns in suspected pathogens. These antibiotics are typically broad-spectrum, in that they treat a wide variety of possible microorganisms. Examples of this include antibiotics prescribed for strep throat, pneumonia, urinary tract infections, and suspected bacterial meningitis in newborns aged 0 to 6 months. Physicians are beginning to target infections with narrow spectrum antibiotics, or synergistically treat infections with small doses of multiple antibiotics to try to prevent antibiotic resistance.
The laboratory can aid the physician in selecting which antibiotic is likely to kill the pathogen that is causing an infection in a patient. There are several methods that are used by clinical microbiologists in this determination, including Kirby-Bauer Antibiotic Sensitivity Testing and the Minimal Inhibitory Concentration (MIC) Test.
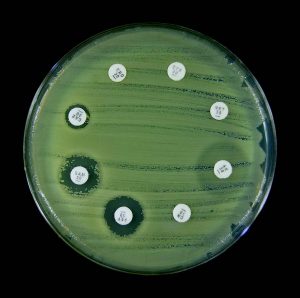
Kirby-Bauer antibiotic sensitivity testing provides an accurate prediction of which antibiotics are likely to be effective against a pathogen. A pure culture of bacteria is spread evenly onto a Mueller-Hinton agar plate. Disk containing different antibiotics are placed on the surface of the plate. The antibiotic will diffuse out of the disk into the media. After incubation, an area of clearing around an antibiotic disk indicates the antibiotic prevented growth of the bacteria. The diameter of the area of clearing (zones of inhibition) is measured in millimeters (mm). The zone measurements are compared against a standard chart. The results are reported as S (sensitive), I (intermediate), and R (resistant) to the antibiotic. A sensitive result indicates the bacteria will die when it is exposed to the antibiotic. An intermediate result indicates the antibiotic must be used in combination with another antibiotic to clear the infection. A resistant result indicates the antibiotic does not kill the bacteria.
The MIC method determines the lowest concentration of an antibiotic that can inhibit the growth of a test organism. Although both the Kirby-Bauer and the MIC are accurate, the MIC gives a more precise indication of the dosage of the antibiotic that should be effective in controlling the infection in the patient. If that dosage of antibiotic can be achieved at the body site of infection (blood, urine, kidneys, etc.), the physician can determine the necessary dosage schedule and the route of administration. Generally, a margin of safety of at least ten times the MIC is desirable to ensure successful treatment of a disease.
An E test is a combination of the MIC and Kirby-Bauer Tests. A plastic-coated strip rather than a filter paper disk contains a gradient of antibiotic concentrations. These diffuse from the strip in the same way as the antibiotics diffuse into the media from the antibiotic containing filter-paper disks. Because there is a gradient concentration, the zone of inhibition will be different along the strip. A technologist can read the MIC from a scale that is printed on top of the disk.
Scientists are concerned with the increasing number of bacterial strains that have become resistant to multiple antibiotics. 33% or 1 in 3 people carry Staphylococcus aureus on their skin and in their nose. 1-2% or 2 in 100 people that carry Staphylococcus aureus have a multiple antibiotic resistant strain or MRSA (methicillin resistant Staphylococcus aureus). Approximately 5% of patients in U.S. hospitals carry MRSA in their nose or on their skin. MRSA is resistant to antibiotics that target the beta-lactam ring including all penicillins (penicillin, amoxicillin, oxacillin, and methicillin), and cephalosporins (keflex).
In the presence of an antibiotic, any bacterium already resistant to that antibiotic will survive and reproduce by binary fission. The resistant bacteria will increase in number. Few bacteria are naturally resistant to an antibiotic. However, bacteria can acquire antibiotic resistance via mutation, conjugation, transformation, and transduction. How do bacteria resist antibiotics?
Bacteria resist antibiotics by:
1. Producing enzymes that destroy the antibiotic
2. Decrease entry of antibiotic into the bacterium by altering membrane permeability to exclude the antibiotic
3. Pump the antibiotic out of the bacterium before it can act. Pumps are embedded in the bacterial membrane capable of pumping any antibiotic out of the bacterium.
4. Alter the target of the antibiotic. Alter peptidoglycan, alter DNA gyrase so antibiotic cannot bind to the target.
5. Change the metabolic pathway. Bacteria can now use folic acid in the environment so antibiotic that stops folic acid synthesis is no longer effective.
The increasing prevalence of antibiotic resistant bacteria has prompted numerous debates regarding the proper use of antibiotics, including questioning their agricultural use in healthy animals. 65% of medically important antibiotics currently sold in the U.S. are for food animal production. Antibiotics should only be prescribed for bacterial infections, not viral infections. Viruses do not have the targets of antibiotics. Patients given an antibiotic prescription should be instructed to take the prescribed dose for the full duration of the treatment. A full course of treatment usually clears an infection, but a partial treatment (too low a dosage and/or too short of a treatment duration) is more likely to allow resistance to the antibiotic to develop.
Staphylococcus epidermidis (S. epidermidis) is a normal inhabitant of the skin and mucous membranes of humans and other animals. Staphylococcus epidermidis is a Gram-positive bacterium. Unlike closely related Staphylococcus aureus, S. epidermidis is generally considered non-pathogenic. However, Staphylococcus epidermidis can cause infections is individuals with weakened immune systems.
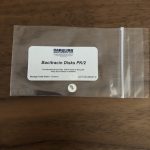
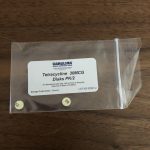
The two antibiotics you will use in this lab exercise are bacitracin and tetracycline. Bacitracin targets the cell wall by interfering with the synthesis of peptidoglycan. It is a narrow-spectrum antibiotic that kills Gram-positive bacteria. The outer membrane of Gram-negative bacteria blocks access to their peptidoglycan cell wall. Bacitracin is produced by a strain of the bacterium Bacillus subtilis. Bacitracin is too toxic to humans for use internally. However, it is commonly applied topically. Tetracycline inhibits protein synthesis by binding bacterial 70s ribosomes. It is a broad-spectrum antibiotic that kills both Gram-positive and Gram-negative bacteria. Tetracycline is produced by members of the bacterial genus Streptomyces. Chemically modified forms of tetracycline are now produced in the laboratory with improved solubility and absorption compared to the original compound. In this laboratory exercise, you will perform Kirby-Bauer Tests to determine if bacitracin and tetracycline are effective in inhibiting the growth of S. epidermidis and Escherichia coli (E. coli). For the sake of comparison, you will also place control disks (sterile paper disks that do not contain an antibiotic) on the surface of the agar plates.
SAFETY
This investigation requires safety goggles, gloves, a lab apron, and proper attire. Read all the instructions for this laboratory exercise before beginning. Follow the instructions closely and observe established laboratory safety practices as outlined in the Safety exercise. Email your instructor with any questions.
 Isopropyl alcohol is flammable. Keep containers of isopropyl alcohol away from any heat or flame sources.
 Chlorine bleach is a corrosive material. Use these materials near a source of running water that can be used as a safety eye wash or safety shower if any corrosive material comes in contact with skin or eyes. Do not use bleach in an area without proper ventilation.
part one-subculturing Staphylococcus epidermidis and escherichia coli (DO NOT just subculture Staphylococcus epidermidis you must also subculture escherichia coli)
| PROPER ATTIRE AND REQUIRED PERSONAL PROTECTIVE EQUIPMENT (PPE) |
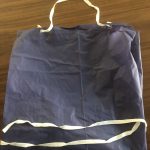
| Laboratory safety apron (from the lab kit, may be a different color). Wear a long-sleeve shirt under the lab apron.
|
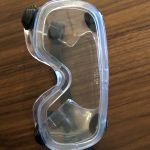
| Safety goggles (from the lab kit)
|
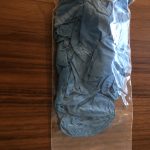
| Disposable gloves (from the lab kit)
|
| Closed-toe shoes that are solid, not made of cloth, not perforated (no ballet flats). To reduce exposure of your body, wear long pants, no skin can be showing, so you may have to wear socks with your shoes. A skirt can be worn but it must fit close to the body and again no skin can be showing. Long hair should be fastened and dangling jewelry or loose hanging garments or sleeves should not be worn. They may contaminate microbial cultures. Avoid loose or dangling clothing or jewelry that could catch on objects or interfere with the lab exercise. |
| REQUIRED SUPPLIES FROM THE LAB KIT |
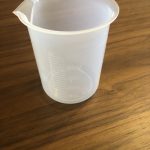
| 250 ml beaker
|
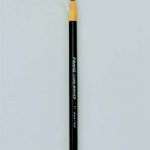
| Grease pencil
|
| Tube rack
|
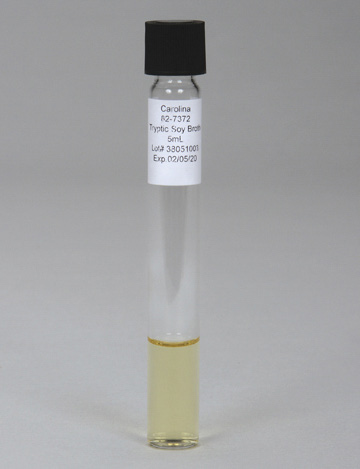
| Tryptic soy broth (2) (stored in the refrigerator) Do not remove the caps!
Allow media that have been stored in the refrigerator to sit at room temperature in the tube rack for 60 minutes prior to use
|
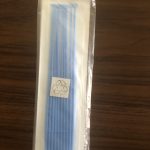
| Inoculating Loops (2) Do not remove the loops from the package!
|

| REQUIRED SUPPLIES YOU PROVIDE |
| Bleach |
| Isopropyl alcohol |
| Paper towels |
| Small disposable plastic container (plastic cup or empty water bottle) filled half way with isopropyl alcohol for disinfect inoculating tools (for lab use only)
|
| Resealable plastic bag (sandwich or quart size) |
| Timer or stopwatch, or resealable plastic bag to protect your cell phone if using it as a timer |
| Cell phone or digital camera to take digital photos |

part one- Subculturing escherichia coli and subculturing Staphylococcus epidermidis
PLEASE NOTE THE CONTENTS OF THE LAB KIT HAVE CHANGED. IN THE DEMONSTRATION VIDEO BELOW NUTRIENT BROTH AND PLATES ARE USED. YOU WILL USE TRYPTIC SOY BROTH AND PLATES INSTEAD.
SUBCULTURING ESCHERICHIA COLI PROCEDURE
1. Retrieve TWO tryptic soy broth tubes from the refrigerator. Place the tubes in the disinfected tube rack on the disinfected work surface. Allow the tubes to sit 60 minutes at room temperature prior to use.
2. Using the grease pencil or permanent marker, label one of the tryptic soy broths with the name of the organism (E. coli) and the date.
3. Remove a sterile loop from its packaging. Aseptically obtain a loop of inoculum from the E. coli stock slant or plate culture.
If you are subculturing from your E. coli tryptic soy stock slant:
Remove the cap from your E. coli tryptic soy slant stock. Remember do not set the cap down. Hold it in the pinky of your dominant hand while holding the tube in your non-dominant hand.
Holding the tube at an angle, insert the inoculating loop to obtain an inoculum (a sample) about the size of a pinhead of your E. coli tryptic soy slant stock, then withdraw the loop. Do not set the loop down. Replace the cap of your E. coli tryptic soy slant stock and set it aside in the tube rack.
If you are subculturing from your E. coli tryptic soy agar stock plate:
Lift the lid of the tryptic soy agar plate slightly. Do not remove the lid completely, and do not set the lid down. Use the lid as a shield to protect the agar from contamination by airborne microorganisms.
Insert the inoculating loop to obtain an inoculum (sample) about the size of a pinhead of your E. coli tryptic soy agar stock plate. Withdraw the loop, do not set the loop down. Replace the lid. Set the plate aside.
4. Remove the cap from the sterile tryptic soy broth tube. Do not set the cap down.
5. While holding the tube at an angle, insert the inoculating loop and stir gently. Remove the loop.
6. Place the used inoculating loop in the disposal cup/bottle and let it soak for at least 30 minutes before discarding it in the trash. Used alcohol can be poured down the drain. Allow the water to run for at least 30 seconds to dilute the alcohol.
7. Screw the cap of the newly inoculated tryptic soy broth to the point of finger tightness, then backwards about one quarter of a turn. Set the tube in the tube rack for incubation. Incubate the tube for 5 days in a consistently warm location (not to exceed 37 °C or 100 °F) out of direct sunlight.
8. If you subcultured from your E. coli tryptic soy stock slant:
Screw the cap of your Escherichia coli tryptic soy slant stock to the point of finger tightness, then backwards about one quarter of a turn. Store your Escherichia coli tryptic soy slant stock in the 250 ml beaker or a cup in the refrigerator.
If you subcultured from your E. coli tryptic soy agar stock plate:
Store your Escherichia coli tryptic soy agar stock plate lid side down in a sealed plastic bag and store it in the refrigerator.
9. Take a photo with your photo ID of the subcultured E. coli tryptic soy broth. The photo will be pasted into the Kirby-Bauer Test Questions Document.
DO NOT STOP! SUBCULTURE STAPHYLOCOCCUS EPIDERMIDIS NOW!!!
SUBCULTURING STAPHYLOCOCCUS EPIDERMIDIS PROCEDURE
1. Using the grease pencil or permanent marker, label the other tryptic soy broth with the name of the organism (S. epi) and the date.
2. Remove a sterile loop from its packaging. Aseptically obtain a loop of inoculum from the S. epidermidis stock slant or plate culture.
If you are subculturing from your S. epidermidis tryptic soy stock slant:
Remove the cap from your S. epidermidis tryptic soy slant stock. Remember do not set the cap down. Hold it in the pinky of your dominant hand while holding the tube in your non-dominant hand.
Holding the tube at an angle, insert the inoculating loop to obtain an inoculum (a sample) about the size of a pinhead of your S. epidermidis tryptic soy slant stock, then withdraw the loop. Do not set the loop down. Replace the cap of your S. epidermidis tryptic soy slant stock and set it aside in the tube rack.
If you are subculturing from your S. epidermidis tryptic soy agar plate:
Lift the lid of the tryptic soy agar plate slightly. Do not remove the lid completely, and do not set the lid down. Use the lid as a shield to protect the agar from contamination by airborne microorganisms.
Insert the inoculating loop to obtain an inoculum (sample) about the size of a pinhead of your S. epidermidis tryptic soy agar stock plate. Withdraw the loop, do not set the loop down. Replace the lid. Set the plate aside.
3. Remove the cap from the sterile tryptic soy broth tube. Do not set the cap down.
4. While holding the tube at an angle, insert the inoculating loop and stir gently. Remove the loop.
5. Place the used inoculating loop in the disposal cup/bottle and let it soak for at least 30 minutes before discarding it in the trash. Used alcohol can be poured down the drain. Allow the water to run for at least 30 seconds to dilute the alcohol.
6. Screw the cap of the newly inoculated tryptic soy broth to the point of finger tightness, then backwards about one quarter of a turn. Set the tube in the tube rack for incubation. Incubate the tube for 3 days in a consistently warm location (not to exceed 37 °C or 100 °F) out of direct sunlight.
7. If you subcultured from your S. epidermidis tryptic soy stock slant:
Screw the cap of your S. epidermidis tryptic soy slant stock to the point of finger tightness, then backwards about one quarter of a turn. Store your S. epidermidis tryptic soy slant stock in the 250 ml beaker or a cup in the refrigerator.
If you subcultured from your S. epidermidis tryptic soy agar stock plate:
Store your S. epidermidis tryptic soy agar stock plate lid side down in a sealed plastic bag and store it in the refrigerator.
8. Take a photo with your photo ID of the subcultured S. epidermidis tryptic soy broth. The photo will be pasted into the Kirby-Bauer Test Questions Document.
9. Disinfect your work area with 10% bleach solution. Wash your lab bench with soap and water to remove the bleach residue. wash your hands thoroughly with soap and water. Dry your hands with paper towel.
AFTER 3 DAY INCUBATION
Read all instructions carefully before you start the experiment. Wear proper attire when performing laboratory experiments.
1. After the 3 day incubation, wash your hands thoroughly with soap and water. Dry your hands with paper towels. Put on your PPE (gloves, safety goggles, apron).
2. Prepare your surface disinfectant. Add 180 ml of tap water to the 250 ml beaker. Now add 20 ml of bleach to the 250 ml beaker. Your surface disinfectant (10% bleach solution) is now ready to use.
3. Disinfect the work surface, tube rack, and grease pencil or permanent marker with surface disinfectant by applying 10% bleach solution with a paper towel, allowing it to remain damp for 2 minutes, and then wiping away any remaining disinfectant with a dry paper towel. Throw the used paper towels in the trash.
4. Take a photo with your photo ID of your E. coli tryptic soy broth subculture. The growth must be clearly visible in the photo. Do not remove the cap to take photo. You may need to experiment with lighting conditions and camera angles to get the best pictures in your work space. The photo will be pasted into the Kirby-Bauer Test Questions Document.
5. Take a photo with your photo ID of the S. epidermidis tryptic soy broth subculture. The growth must be clearly visible in the photo. Do not remove the cap to take photo. You may need to experiment with lighting conditions and camera angles to get the best pictures in your work space. The photo will be pasted into the Kirby-Bauer Test Questions Document.
6. DO NOT dispose of your E. coli or S. epidermidis tryptic soy broth subcultures! You will use them to for PART TWO of this lab exercise.
7. Begin PART TWO Now!
part two- KIRBY-BAUER TESTING
| REQUIRED SUPPLIES FROM THE LAB KIT |
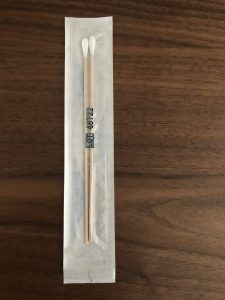
| Sterile swabs (2) Do not remove the swabs from the package!
|
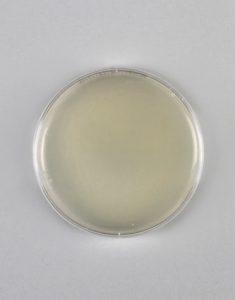
| Tryptic soy agar plates (2) (stored in the refrigerator) Do not remove the lids!
PLEASE USE A TRYPTIC AGAR PLATE. DO NOT USE ONE OF THE OTHER AGAR PLATES! Allow media that have been stored in the refrigerator to sit at room temperature for 60 minutes prior to use
|
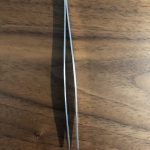
| Forceps
|
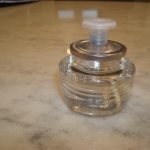
| Paraffin candle
|
| Tube rack
|
| Grease pencil
|
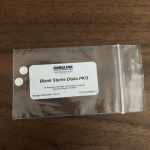
| Sterile control disks (2) (stored in the refrigerator)
|
| Bacitracin disks (2) (stored in the refrigerator)
|
| Tetracycline disks (2) (stored in the refrigerator)
|
| REQUIRED SUPPLIES YOU PROVIDE |
| Staphylococcus epidermidis tryptic soy broth subculture from PART ONE of this lab exercise |
| Escherichia coli tryptic soy broth subculture from PART ONE of this lab exercise |
| Bleach |
| Isopropyl alcohol |
| Paper towels |
| Small disposable plastic container (plastic cup or empty water bottle) filled half way with isopropyl alcohol for disinfect inoculating tools (for lab use only)
|
| Matches or a lighter |
| Large disposable plastic container filled half way with 10% bleach solution for disinfecting cultures (for lab use only)
|
| Resealable plastic bag (sandwich or quart size) |
| Timer or stopwatch, or resealable plastic bag to protect your cell phone if using it as a timer |
| Cell phone or digital camera to take digital photos |
Kirby-bauer test procedure
1. Prepare for inoculating tool disinfection by filling a small, disposable, plastic container (8 ounce or larger plastic cup or empty water bottle) two thirds of the way with isopropyl alcohol. Prepare for culture disinfection by filling a large, disposable, plastic container half way with surface disinfectant (10% bleach solution).
2. Retrieve two tryptic soy agar plates. Using the grease pencil or permanent marker, label the outside of the bottom half (the half that contains the media) of the tryptic soy agar plate with the date. Label one plate “E. coli” and the other “S. epidermidis.”
3. Obtain the antibiotic and control disks stored in the refrigerator. Do not remove any of them from their packaging until you are ready to place each disk on the surface of the inoculated agar. The packaging keeps the disks sterile.
2. Completely close the cap of the E. coli and S. aureus nutrient broth cultures and resuspend by tapping or rolling gently between your palms.
PLEASE NOTE THE CONTENTS OF THE LAB KIT HAVE CHANGED. IN THE DEMONSTRATION VIDEO BELOW NUTRIENT AGAR PLATES ARE USED. YOU WILL USE TRYPTIC SOY AGAR PLATES INSTEAD.
3. Using the pinky finger of your dominant hand (or your pinky and ring fingers), remove the cap from the E. coli tryptic soy broth culture. DO NOT set the cap down. Hold it with your pinky while the tube is open.
8. Remove one sterile swab from its packaging. Peel the paper cover from the wooden end of the swab. Handle ONLY the wooden end of the swab to maintain the sterility of the cotton end. Insert a sterile swab into the broth. Recap the cap of the E.coli tryptic soy broth culture aside in the tube rack.
9. Lift the lid of the E. coli tryptic soy agar plate slightly. Do not remove the lid completely, and do not set the lid down. Use the lid as a shield to protect the agar from contamination by airborne microorganisms.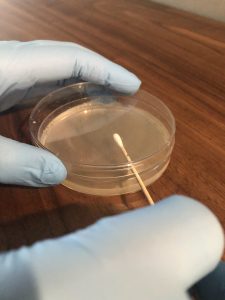
10. Inoculate the plate by gently pulling the swab back and forth across the entire surface of the agar in a very tight zigzag pattern.
11. Turn the plate approximately 90°, and, without dipping the swab back into the E. coli tryptic soy broth culture, pull the swab again over the entire surface of the agar in a very tight zigzag pattern. Try not to miss any of the agar surface.
12. Repeat Step 11 two more times until you have swabbed the entire surface of the agar four times.
13. Place the used swab in the inoculating tools disposal cup/bottle and let it soak for at least 30 minutes before discarding it in the trash. Used alcohol can be poured down the drain. Allow the water to run for at least 30 seconds to dilute the alcohol.
14. Using a match or lighter, light your paraffin candle. Be sure to keep the candle a safe distance from the open container of isopropyl alcohol.
15. Dip your forceps into the disposal jar of isopropyl alcohol, tapping them gently on the rim of the jar to remove excess alcohol. Let the tip of the forceps point downward to avoid alcohol dripping on your hand. Light the remaining alcohol on the forceps with the candle, and allow it to burn off while holding it away from your body. Wait at least 15–20 seconds for the forceps to cool. Do not set the forceps down to wait for them to cool, or they will become contaminated.
16. Using the forceps, obtain a control disk (a blank paper disk). Open the lid of the E. coli plate slightly and place the disk gently on the surface of the agar, referring to the figure below for this and subsequent disk placements. Press on the disk very carefully with the forceps to make sure it is evenly seated. Do not press the disk below the surface of the agar or break the surface of the agar. Replace the lid of the E. coli plate immediately.

17. Dip your forceps into the disposal jar of isopropyl alcohol, tapping them gently on the rim of the jar to remove excess alcohol. Let the tip of the forceps point downward to avoid alcohol dripping on your hand. Light the remaining alcohol on the forceps with the candle, and allow it to burn off while holding it away from your body. Wait at least 15–20 seconds for the forceps to cool. Do not set the forceps down to wait for them to cool, or they will become contaminated.
18. Using the forceps, obtain a bacitracin antibiotic disk. Open the lid of the E. coli plate slightly and place the disk gently on the surface of the agar, referring to the figure above for this and subsequent disk placements. Press on the disk very carefully with the forceps to make sure it is evenly seated. Do not press the disk below the surface of the agar or break the surface of the agar. Replace the lid of the E. coli plate immediately.
19. Dip your forceps into the disposal jar of isopropyl alcohol, tapping them gently on the rim of the jar to remove excess alcohol. Let the tip of the forceps point downward to avoid alcohol dripping on your hand. Light the remaining alcohol on the forceps with the candle, and allow it to burn off while holding it away from your body. Wait at least 15–20 seconds for the forceps to cool. Do not set the forceps down to wait for them to cool, or they will become contaminated.
20. Using the forceps, obtain a tetracycline antibiotic disk. Open the lid of the E. coli plate slightly and place the disk gently on the surface of the agar, referring to the figure above for this and subsequent disk placements. Press on the disk very carefully with the forceps to make sure it is evenly seated. Do not press the disk below the surface of the agar or break the surface of the agar. Replace the lid of the E. coli plate immediately.
21. Take a photo with your photo ID of the E. coli Kirby- Bauer test plate. This photo will be pasted into the Kirby-Bauer Test Questions Document.
22. Using the pinky finger of your dominant hand (or your pinky and ring fingers), remove the cap from the S. epidermidis nutrient broth culture. DO NOT set the cap down. Hold it with your pinky while the tube is open.
23. Remove one sterile swab from its packaging. Peel the paper cover from the wooden end of the swab. Handle ONLY the wooden end of the swab to maintain the sterility of the cotton end. Insert a sterile swab into the broth. Recap the cap of the S. epidermidis nutrient broth culture aside in the tube rack.
24. Lift the lid of the S. epidermidis nutrient agar plate slightly. Do not remove the lid completely, and do not set the lid down. Use the lid as a shield to protect the agar from contamination by airborne microorganisms.
25. Inoculate the plate by gently pulling the swab back and forth across the entire surface of the agar in a very tight zigzag pattern.
26. Turn the plate approximately 90°, and, without dipping the swab back into the S. epidermidis tryptic soy broth culture, pull the swab again over the entire surface of the agar in a very tight zigzag pattern. Try not to miss any of the agar surface.
27. Repeat Step 26 two more times until you have swabbed the entire surface of the agar four times.
28. Place the used swab in the inoculating tools disposal cup/bottle and let it soak for at least 30 minutes before discarding it in the trash. Used alcohol can be poured down the drain. Allow the water to run for at least 30 seconds to dilute the alcohol.
29. Dip your forceps into the disposal jar of isopropyl alcohol, tapping them gently on the rim of the jar to remove excess alcohol. Let the tip of the forceps point downward to avoid alcohol dripping on your hand. Light the remaining alcohol on the forceps with the candle, and allow it to burn off while holding it away from your body. Wait at least 15–20 seconds for the forceps to cool. Do not set the forceps down to wait for them to cool, or they will become contaminated.
30. Using the forceps, obtain a control disk (a blank paper disk). Open the lid of the S. epidermidis plate slightly and place the disk gently on the surface of the agar, referring to the figure below for this and subsequent disk placements. Press on the disk very carefully with the forceps to make sure it is evenly seated. Do not press the disk below the surface of the agar or break the surface of the agar. Replace the lid of the S. epidermidis plate immediately.
31. Dip your forceps into the disposal jar of isopropyl alcohol, tapping them gently on the rim of the jar to remove excess alcohol. Let the tip of the forceps point downward to avoid alcohol dripping on your hand. Light the remaining alcohol on the forceps with the candle, and allow it to burn off while holding it away from your body. Wait at least 15–20 seconds for the forceps to cool. Do not set the forceps down to wait for them to cool, or they will become contaminated.
32. Using the forceps, obtain a bacitracin antibiotic disk. Open the lid of the S. epidermidis plate slightly and place the disk gently on the surface of the agar, referring to the figure above for this and subsequent disk placements. Press on the disk very carefully with the forceps to make sure it is evenly seated. Do not press the disk below the surface of the agar or break the surface of the agar. Replace the lid of the S. epidermidis plate immediately.
33. Dip your forceps into the disposal jar of isopropyl alcohol, tapping them gently on the rim of the jar to remove excess alcohol. Let the tip of the forceps point downward to avoid alcohol dripping on your hand. Light the remaining alcohol on the forceps with the candle, and allow it to burn off while holding it away from your body. Wait at least 15–20 seconds for the forceps to cool. Do not set the forceps down to wait for them to cool, or they will become contaminated.
34. Using the forceps, obtain a tetracycline antibiotic disk. Open the lid of the S. epidermidis plate slightly and place the disk gently on the surface of the agar, referring to the figure above for this and subsequent disk placements. Press on the disk very carefully with the forceps to make sure it is evenly seated. Do not press the disk below the surface of the agar or break the surface of the agar. Replace the lid of the S. epidermidis plate immediately.
35. Take a photo with your photo ID of the S. epidermidis Kirby-Bauer test plate. This photo will be pasted into the Kirby-Bauer Test Questions Document.
36. Invert the E. coli and S. epidermidis plates (turn it lid side down) for incubation. This will prevent condensation from disrupting microbial growth. Incubate the plates for 3 days in a consistently warm location (not to exceed 37 °C or 100 °F) out of direct sunlight.
37. Immerse the E. coli and S. epidermidis tryptic soy broth cultures from part one of this lab exercise into the culture disinfection container and remove the cap. Allow the cultures to soak in the bleach for at least 24 hours. After the cultures have soaked for at least 24 hours while wearing your PPE, pour the 10% bleach down the drain with the faucet running. Let the faucet continue to run for at least 30 seconds to dilute the bleach. Place the disinfected tubes in a sealed plastic bag, and discard in the trash. Be sure to wash your hands after removing your gloves.
38. Disinfect your work area with 10% bleach solution. Wash your lab bench with soap and water to remove the bleach residue. wash your hands thoroughly with soap and water. Dry your hands with paper towel.
AFTER 3 DAY INCUBATION
Read all instructions carefully before you start the experiment. Wear proper attire when performing laboratory experiments.
1. After the 3 day incubation, wash your hands thoroughly with soap and water. Dry your hands with paper towel. Put on your PPE (gloves, safety goggles, apron).
2. Prepare your surface disinfectant. Add 180 ml of tap water to the 250 ml beaker. Now add 20 ml of bleach to the 250 ml beaker. Your surface disinfectant (10% bleach solution) is now ready to use.
3. Disinfect the work surface, tube rack, and grease pencil or permanent marker with surface disinfectant by applying 10% bleach solution with a paper towel, allowing it to remain damp for 2 minutes, and then wiping away any remaining disinfectant with a dry paper towel. Throw the used paper towels in the trash.
4. Prepare for inoculating tool disinfection by filling a small, disposable, plastic container (8 ounce or larger plastic cup or empty water bottle) half way with isopropyl alcohol. Prepare for culture disinfection by filling a large, disposable, plastic container two thirds of the way with the surface disinfectant (10% bleach solution).
5. Take a photo with your photo ID of BOTH of the Kirby-Bauer test plates. The growth on the plate must be clearly visible in the photo. Do not remove the lid of the Petri dish to take photos. Avoid the use of the flash, which will simply be reflected off of the lid. You may need to experiment with lighting conditions and camera angles to get the best pictures in your work space. These photos will be pasted into the Kirby-Bauer Test Questions Document.
6. Examine plates with the lids on. Do not remove the lids of the Petri dishes during any observations, as this may result in contamination. The surface of the agar in both plates should be completely covered with bacterial growth, except for clear zones of inhibition surrounding some of the antibiotic disks. This type of continuous bacterial growth is referred to as confluent lawn of growth.

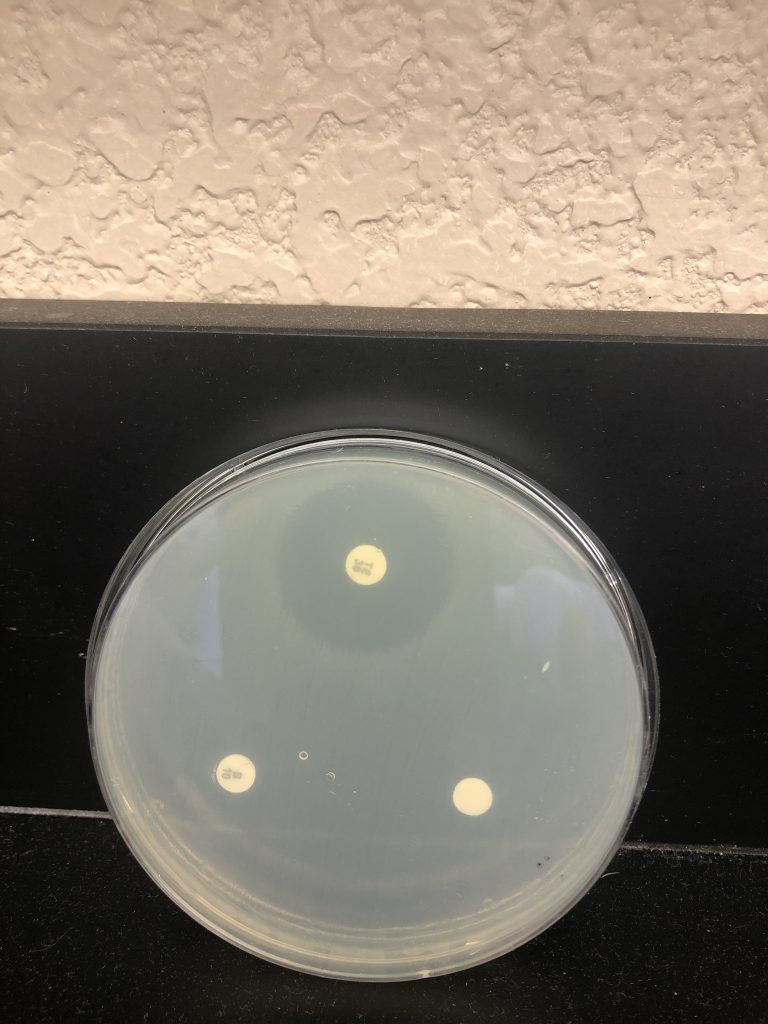
7. While keeping each Petri dish closed, using the ruler from the lab kit, measure the diameter (in millimeters, the smallest measurement on the metric side of the ruler) of each zone of inhibition and record your data in the Data Table in the Kirby-Bauer Questions Document. There are codes on the antibiotic disks to help you identify the disks (bacitracin B 10, tetracycline Te 30). If necessary, round to the nearest whole millimeter. If the bacterial growth goes right up to the edge of a disk, record the zone of inhibition as “zero (0) mm.”

8. Referring to the Zone of Inhibition Interpretive Standards in the Kirby-Bauer Test Questions Document, determine if each bacterium is resistant (R), intermediate (I), or susceptible (S) to each disk, and record this in the Data Table.
9. Immerse the E. coli and S. epidermidis plates into the culture disinfection container and remove the lid. Allow the culture to soak in the bleach for at least 24 hours. After the culture has soaked for at least 24 hours while wearing your PPE, pour the 10% bleach down the drain with the faucet running. Let the faucet continue to run for at least 30 seconds to dilute the bleach. Place the disinfected plates in a sealed plastic bag, and discard them in the trash.
10. Disinfect your work area with 10% bleach solution. Wash your lab bench with soap and water to remove the bleach residue. wash your hands thoroughly with soap and water. Dry your hands with paper towel.
discoveries in microbiology
ELIZABETH BUGIE GREGORY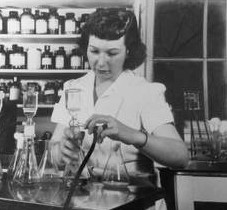
Elizabeth Bugie Gregory was an American microbiologist and biochemist. In 1944, Gregory, Selman Waksman, and Albert Schatz discovered the antibiotic streptomycin. Gregory was told that it was not important for her name to be on the patent as she would “one day get married and have a family”. Waksman went on the win the Nobel Prize for medicine in 1952 and took full credit for the discovery. Through a court settlement, Schatz was awarded 3% of the royalties for streptomycin and was officially recognized as co-discoverer of streptomycin. Waksman claimed that Gregory was more involved in the discovery than Schatz. Gregory was awarded 0.2% of the royalties for streptomycin.